

Note: The English articles on this blog are translations from Japanese, so there may be unnatural expressions or unclear content in the English text or images.
This article is intended for those who have completed the following four steps:
・Installation of Unity and VCC (VRChat Creator Companion)
・Integration of Modular Avatar into VCC
・Purchase and integration of necessary data into Unity
・Avatar upload in its unmodified state
For beginners or those who have not yet completed these steps, we recommend checking the respective introductory guides linked below for clear instructions.
もくじ
- 1 ▪Before Starting the Dress-Up Process
- 2 ▪Dress-Up Work
- 3 ▪Upload and Fine-tuning
【Caution】Regarding Issues with VRChat SDK Updates
As of the VRChat SDK 3.7.0 update on August 14, 2024,
a phenomenon has been reported where customized data may become corrupted when performing specific operations in an environment using Modular Avatar.
Details of the issue and solutions are explained in the article linked below.
If you are using Modular Avatar version 1.9.13 or earlier, it is strongly recommended to review this information before making any customizations.
▪Before Starting the Dress-Up Process
Prerequisite Articles
About the installation of Unity and VCC (VRChat Creator Companion)

About the integration of Modular Avatar into VCC
About the method for purchasing necessary data
About uploading an avatar in its uncustomized state
Additionally, this article contains a large volume of content, which might make it tiring to read through midway. Therefore, we have also prepared a video. If you find reading text difficult, we would be delighted if you could watch the video!
Steps and Time Required for Customization
During the outfit customization process, multiple uploads may be necessary for operational checks. This article also uses data that has successfully uploaded an avatar in its uncustomized state for demonstration purposes. Therefore, it is strongly recommended to prepare a project where you have already successfully uploaded an avatar in its uncustomized state and use it as a reference for customization based on this article.
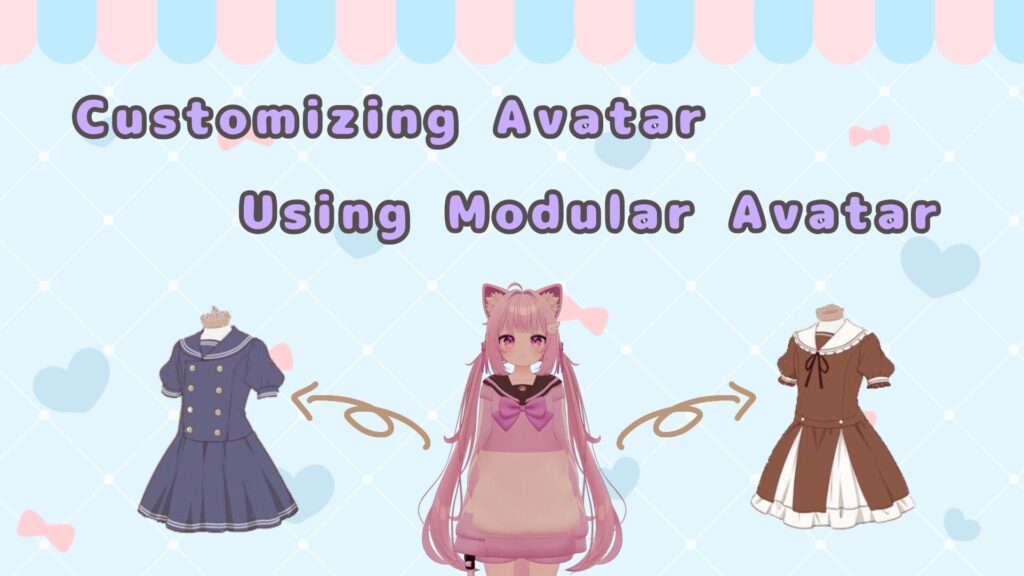
The steps for outfit customization using Modular Avatar (MA) are as follows:
1. Install Modular Avatar
(Only the activation method is described here, as the setup is explained in prerequisite articles.)
2. Import compatible outfit and avatar data
(Only non-covered sections are described here, as the setup is explained in prerequisite articles.)
3. Prepare the avatar
4. Attach the outfit
5. Activate and operate MA
6. Upload and verify functionality
(Previously explained sections are omitted.)
The required work time is approximately 45 to 90 minutes.
This article primarily explains steps 3 to 6 in detail.
Activation of the Modular Avatar
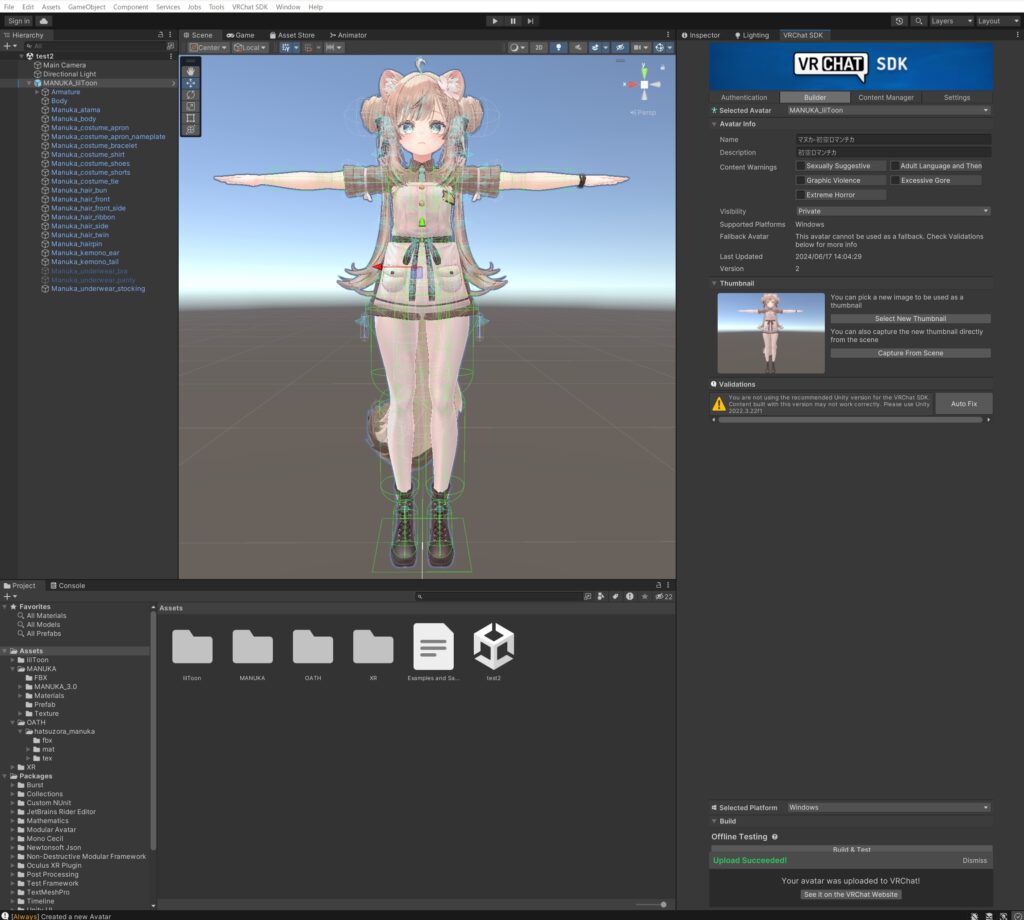
After confirming that Modular Avatar has been installed via VCC, create a new project within VCC or open the menu for the project you will use. Then, check that Modular Avatar is displayed under Manage Packages.
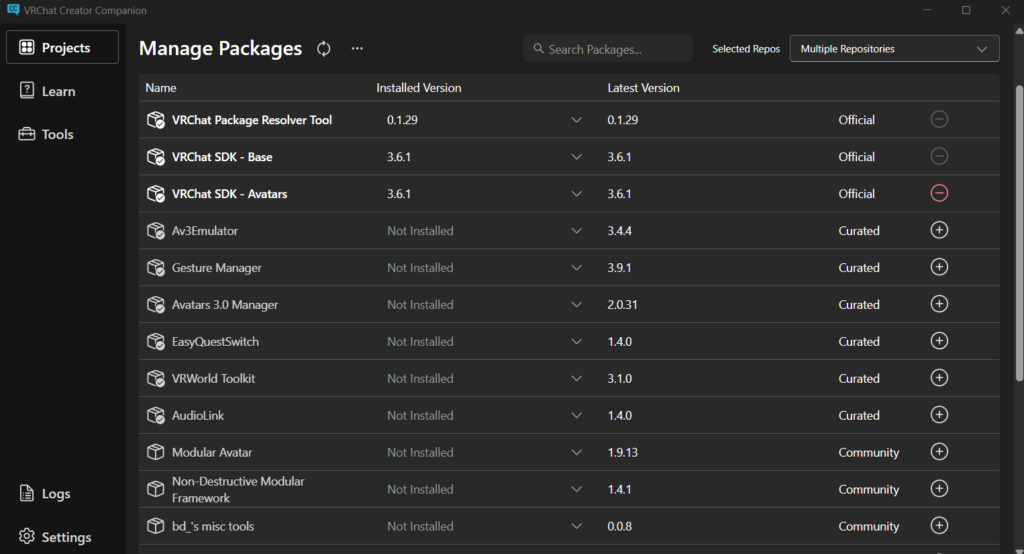
Once confirmed, click the + icon on the right side of the screen to activate Modular Avatar. If the text “Modular Avatar” changes from light gray to bold white, and the + icon changes to a red –, as shown in the image below, the activation is successful.

Modular Avatar is not activated in a newly created project by default!
When creating a new project to use Modular Avatar, make sure to activate it without fail.
Downloading & Importing the necesarry data
Once the installation of Modular Avatar is successfully completed, the next step is to download and import the necessary data into your Unity project!
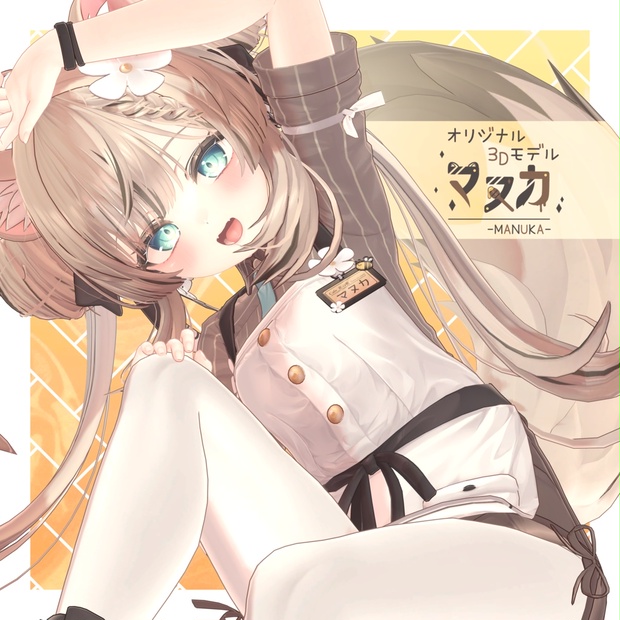
About the Avatar and Outfit Used in This Article
The avatar and outfit used as examples in this article are paid items. Please note this in advance.
The avatar and outfit used as examples in this explanation are as follows:
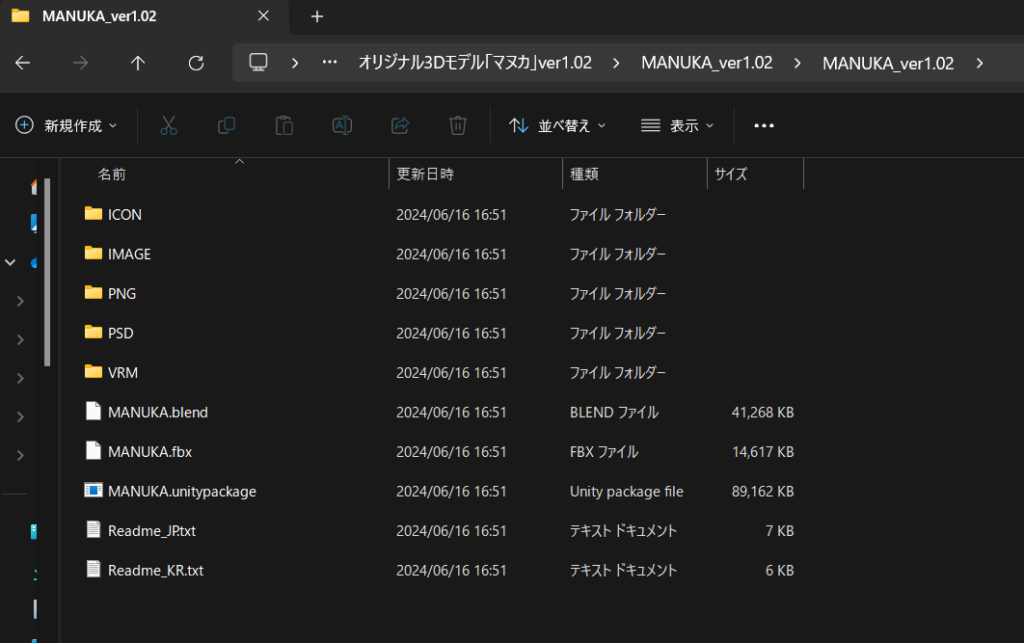
Original 3D Model “Manuka” ver1.02
Price: 6000 JPY1
 オリジナル3Dモデル「マヌカ」 製作者: 진권/ジンゴ このモデルはBlender 2.83で製作されました。 他のプログラムでの互換性は保障いたしません。
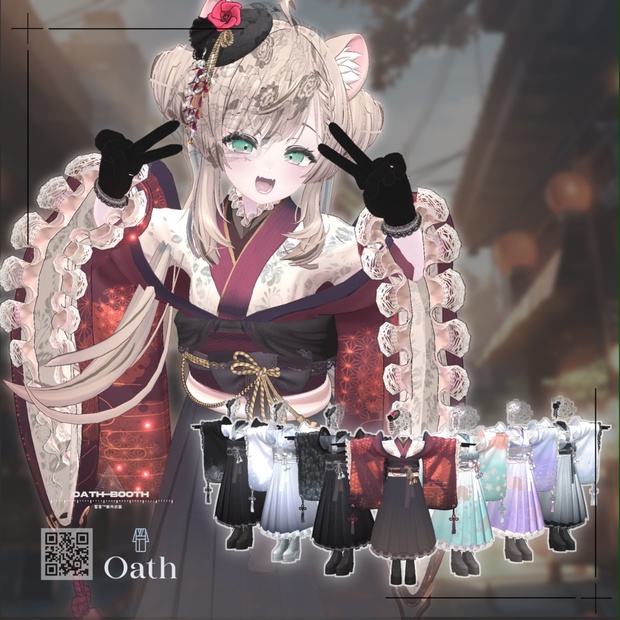
【Multiple Avatar-Compatible 3D Outfit】Hatsuzora Romantica
Price:2000 JPY2
 ◆対応アバター&シェイプキー一覧(今後増加する可能性があります) ・オリジナル3Dモデル「マヌカ」 (https://booth.pm/ja/items/5058077) 対応シェイプキー:breast small,breast big(plus非対応) ・Lapwing (https://kujishift.booth.pm/items/4993931) ・森羅 オリジナル3Dモデル #Shinra3D (https://booth.pm/ja/items/4707634) 対応シェイプキー:breast small,breast big ・オリジナル3Dモデル「桔梗」
 Taro
Taro When downloading files, it is highly recommended to set and organize a fixed save location at the same time! As customizations progress, the number of files tends to increase, which can make locating them more time-consuming…
Precautions During Extraction
Data purchased from platforms like Booth is usually provided in a compressed zip format. Since Unity cannot use files in this compressed state, you need to extract (unzip) them.
Right-click on the downloaded zip file and select “Extract All” from the menu.
In the window that appears, click “Extract” to start the extraction process.

Ensure that the option “Show extracted files when complete(H)” is checked to view the extracted files immediately after completion.
If the extracted files do not appear automatically, navigate to the same directory as the zip file to locate the unzipped folder manually.
As shown in the image below, if the contents are displayed in a separate tab after the process is completed, it is successful.
Rarely, errors may occur during extraction, such as file corruption or failure to unzip. This can happen with very large files or files with long names due to limitations of Windows’ default extraction tool. To avoid such issues, consider using external extraction tools like 7-Zip
圧縮・解凍ソフト7-Zipは、7z、ZIP、RAR、LZH、ISO、TAR、DMG、MSIなど、さまざまなデータフォーマットに1つで対応している世界的にデファクトのフリーソフトウェアです。AES256による暗号化(パスワード圧縮および解凍)も可能なおすすめのソフトです。
External extraction tools are highly functional and very convenient if mastered. However, their operations tend to be complex, making them more difficult to handle. Additionally, depending on the settings, they may place a high load on your PC during operation, potentially causing Unity to become unstable.For this reason, it is recommended not to forcefully or proactively use external tools when you are just starting out. Instead, consider switching to appropriate tools only when specific issues arise.
▪Dress-Up Work
Avatar Preparation
Thank you for your efforts in completing the setup. Now, all the necessary data has been prepared.
From here, we will move to the Unity screen and proceed with the customization work.
The operations may become a bit complex, but let’s take it slow and steady.
Complete Upload in Non-Customized State
Follow the conventional procedure to upload the avatar to VRC once in its non-customized state.
If you encounter issues at this stage, please check the following points:
・Are the versions of Unity, Unity Hub, and VCC you are using those recommended by VRC?
・Are the Unity and shader versions specified for the 3D model being used?
・Have you logged in on the VRCSDK screen?
・Have you set up all required fields such as avatar name, description, and attached photo?
・Is the data placed in the Hierarchy a PrefabAsset rather than an FBX file?
・Are there no red angular errors in Validations?
(If there is an AutoFix button, pressing it can resolve the issue.)
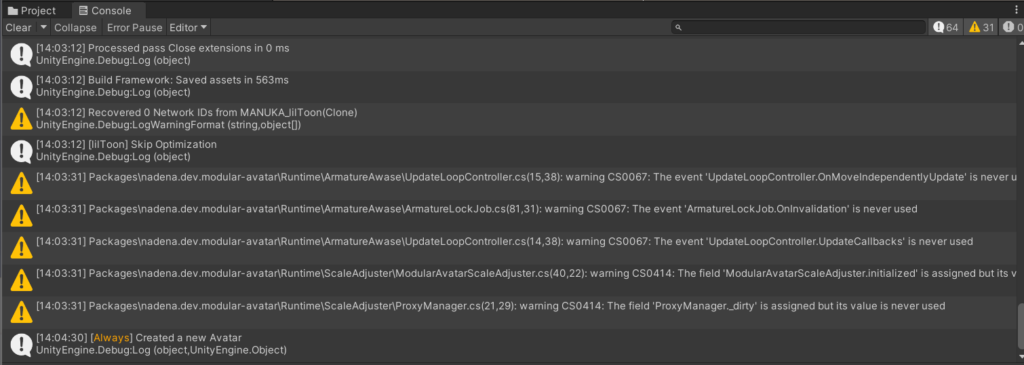
If none of these apply, select the Console tab next to Project and check the error code displayed there.
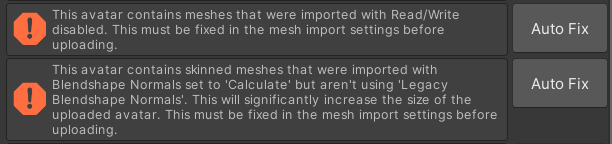
Example of Red Angular Errors
Errors displayed in the Console may sometimes point to locations other than where the actual issue lies due to Unity’s specifications. Be cautious when investigating causes based on Console errors.
Attaching and Removing Avatar Clothing and Accessories
If there are PrefabAssets for dress-up purposes in the Prefab folder, you can skip this step by using them.
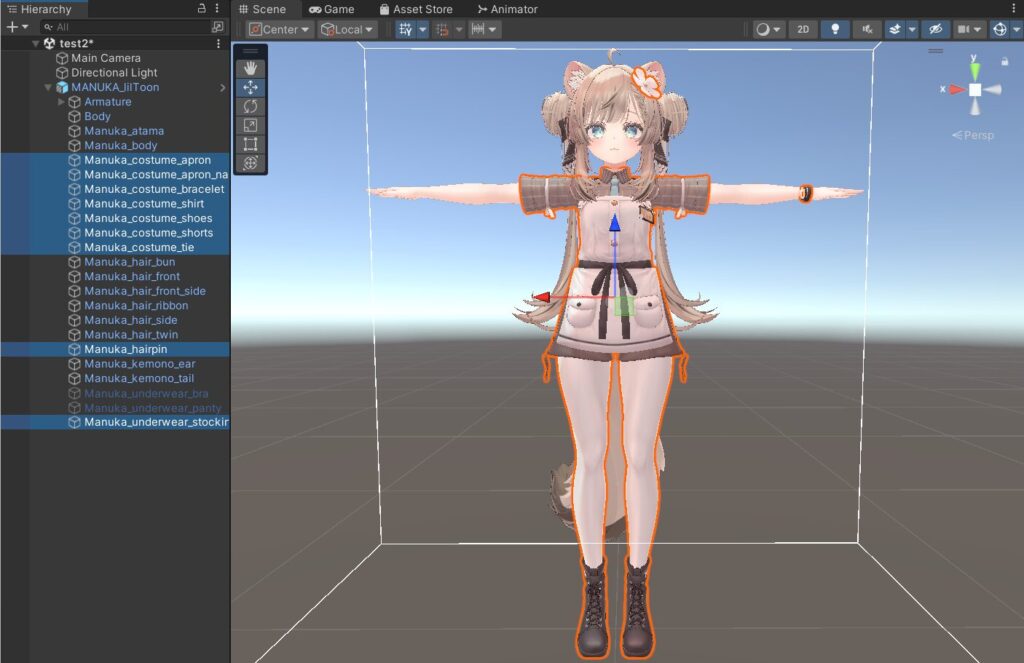
First, click the triangle▶ on the side of the avatar folder in the Hierarchy to expand its contents.

The expanded folder contains files that manage each part of the avatar, such as clothing and accessories.
From these files, select all clothing or accessory files that interfere with the dress-up process, as shown in the image below.
 Taro
Taro While in the Unity screen, you can hold down the Control key and click on objects to select multiple items at once.
This might be useful when handling many objects simultaneously!
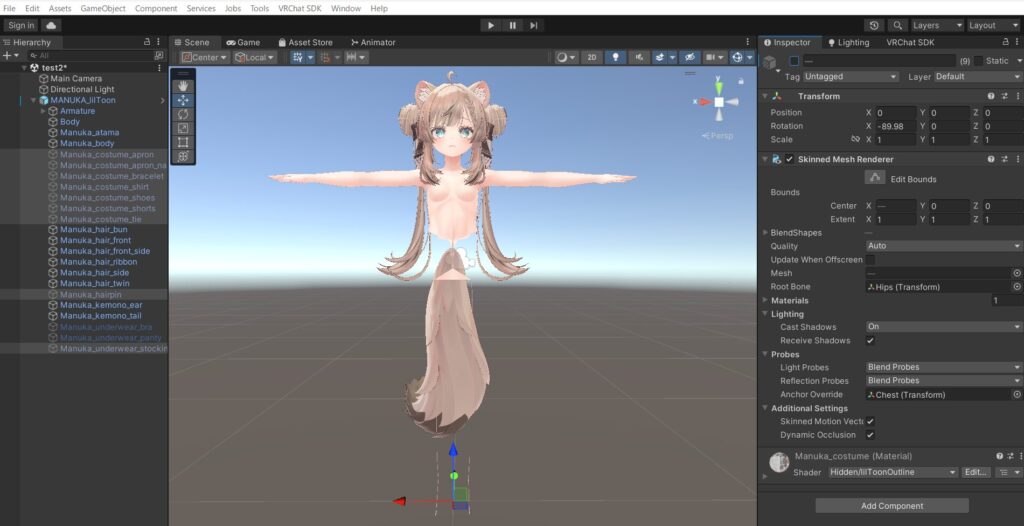
After selecting the files, go to the Inspector tab at the top right of the Unity screen and click the checkbox located directly below the word “Inspector” to uncheck it, thereby disabling the objects.
If the clothing or accessories worn by the avatar become hidden as shown below, it is a success.
Even if you accidentally hide parts that don’t need to be hidden, you can individually select those parts and recheck the checkbox mentioned earlier in order to make them visible again.
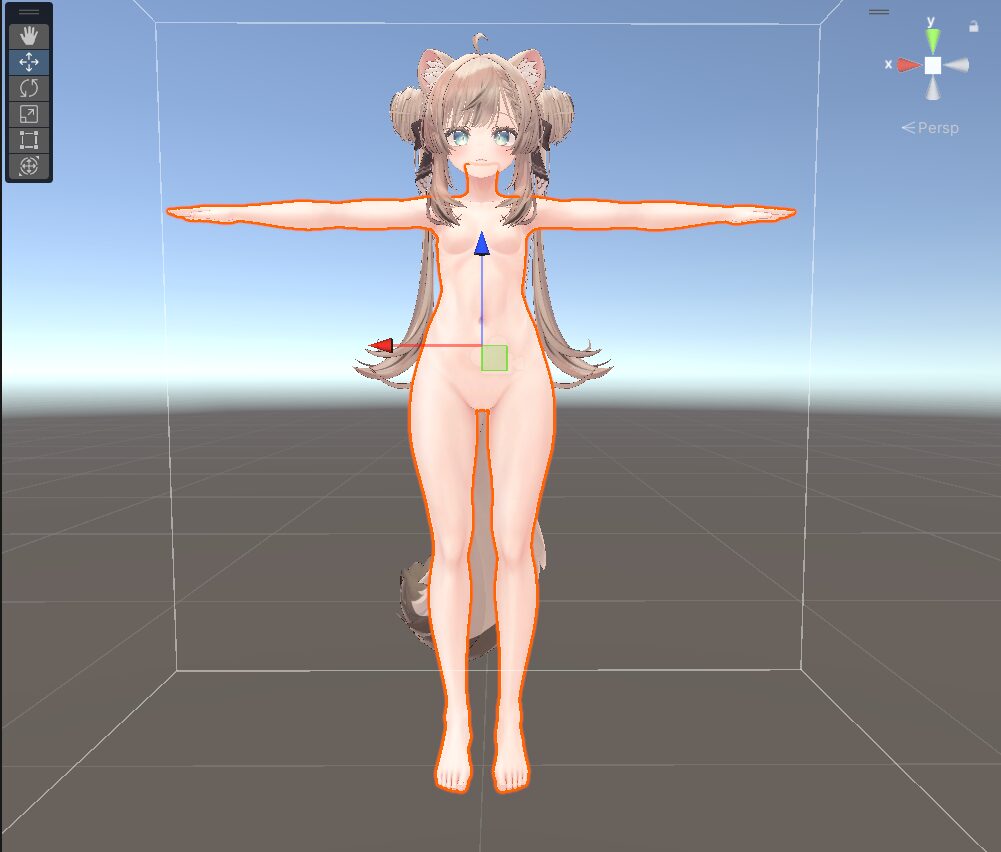
Once clothing has been successfully hidden, you can view the base model of your avatar.
At this stage, you may notice that parts like arms, legs, or torso appear thinly distorted like lines. This is because a feature called BlendShape Keys is used to slightly shrink these parts to prevent body parts from clipping through clothing when moving in-game.
Adjusting Avatar BlendShape Keys
Using BlendShape Keys to compress the body and prevent clipping is very convenient. However, depending on the outfit, there may be situations where skin needs to be visible, or the body becomes difficult to see during alignment. Therefore, it is necessary to revert the compressed body parts to their original state before dressing the avatar.
BlendShape Keys for avatars are often grouped into two main areas: head and torso.
In this case, we will adjust the BlendShape Keys for the torso to modify its size.
At first, use the same method as when hiding clothing to locate and select the file responsible for managing the torso.
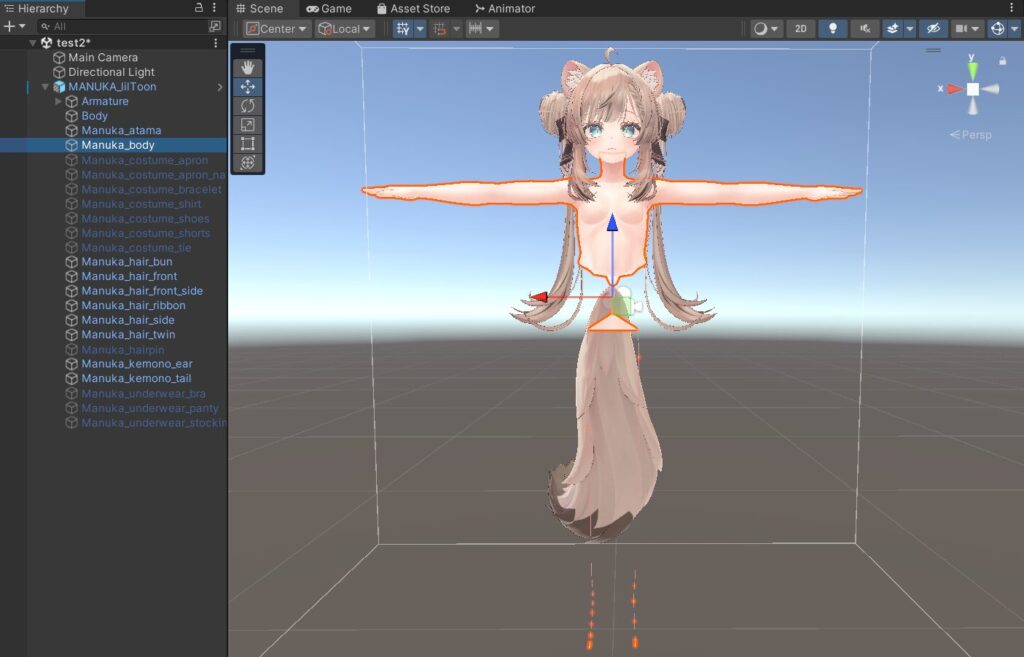
The name of the file managing the torso may vary depending on the avatar. The names shown in this article are for Manuka v1.02. Please keep this in mind.
Taro Files labeled only as “body” often manage the head.
Instead, names like “○○_body” or “body_all” may be used for the torso. Keep this in mind when searching for the file that manages the torso!
After selecting the torso, open the Inspector tab, find the BlendShapes section, and click the ▶ to expand the list of stored blend shape keys.
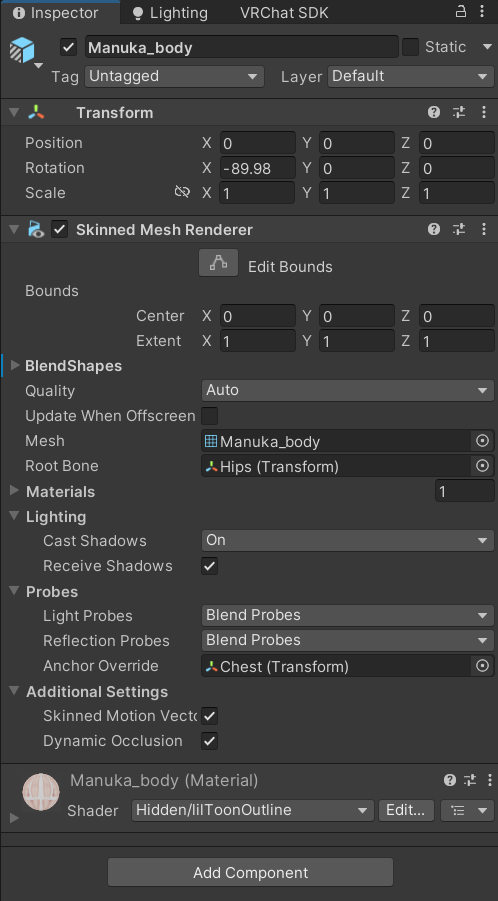
If the BlendShapes tab expands and displays a list of blend shape keys as shown in the image below, you’ve succeeded.
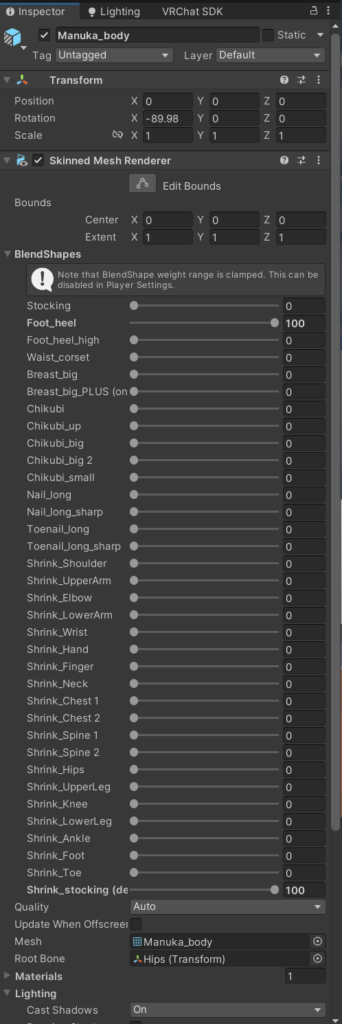
From the displayed blend shape keys, find the one you want to use and select its slider.
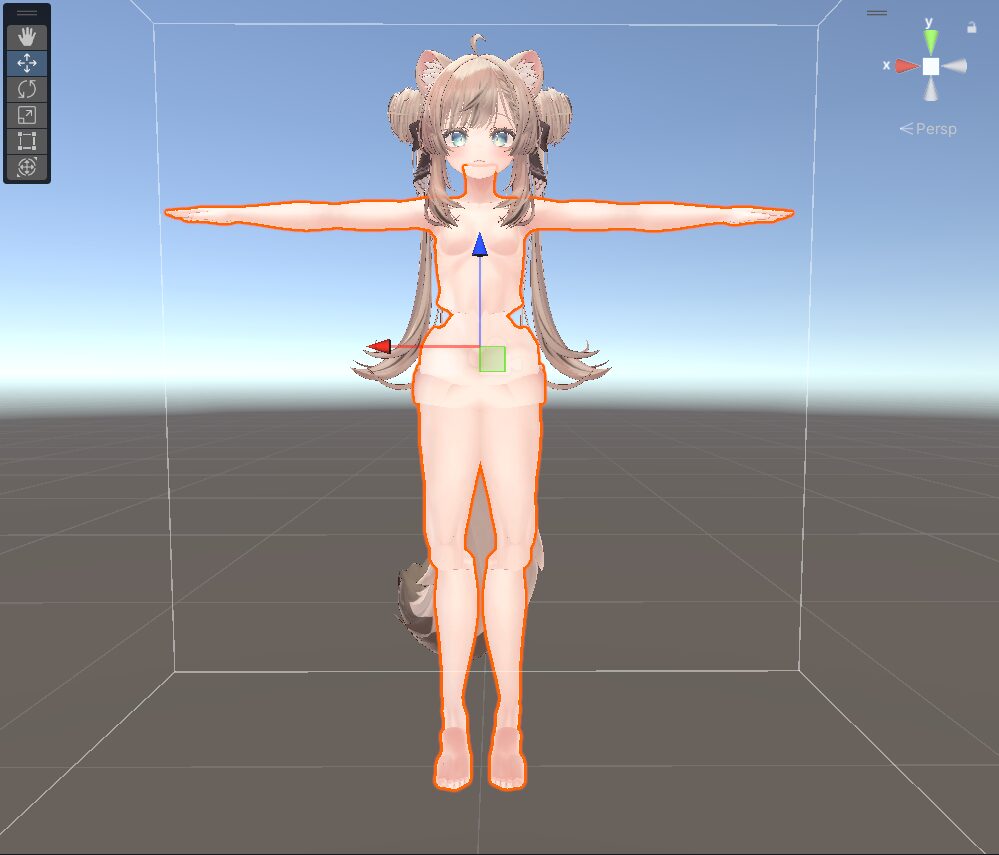
In this case, it seems the lower body is compressed by a shape key called “Shrink_stocking(default)”, so select that slider and move it towards 0 (disable).


If the compressed lower body returns to its original shape as shown in the image below, you’ve succeeded.
Notes on Linked Shape Keys and Adjustments
Some blend shape keys operate multiple shape keys simultaneously. The “Shrink_stocking(default)” shape key we used also controls 8 blend shape keys at once:
Shrink_Spine2, Shrink_Hips, Shrink_UpperLeg, Shrink_UpperLeg, Shrink_Knee,
Shrink_LowerLeg, Shrink_Ankle, Shrink_Foot, Shrink_Toe
Therefore, if these shape keys are not disabled (set to 0) when used, unexpected results like those shown in the image below may occur.
 Taro
Taro The number and corresponding areas of blend shape keys vary depending on the avatar.
When making adjustments, it’s recommended to move the sliders around beforehand to check which parts change!
Once you’ve completed these steps, your avatar preparation is complete!
Attaching the Outfit
Once the avatar preparation is complete, the next step is preparing the outfit.
This article explains from the point after the outfit’s unitypackage has been imported into Unity. If you haven’t done this yet, please refer to the article below to import it in advance.
Checking the Outfit
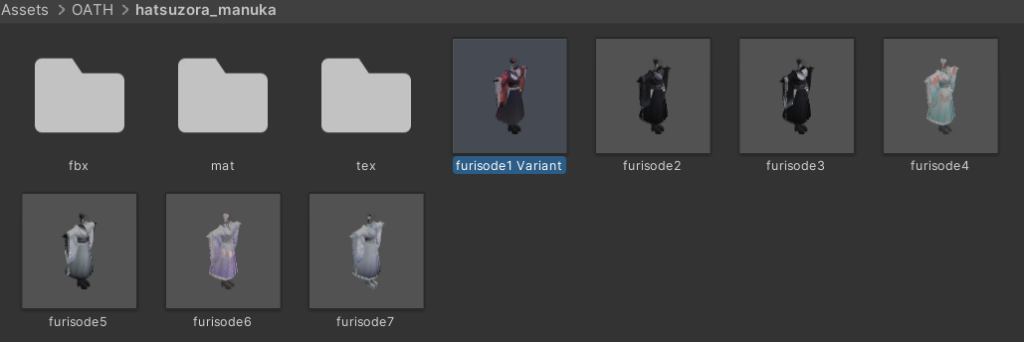
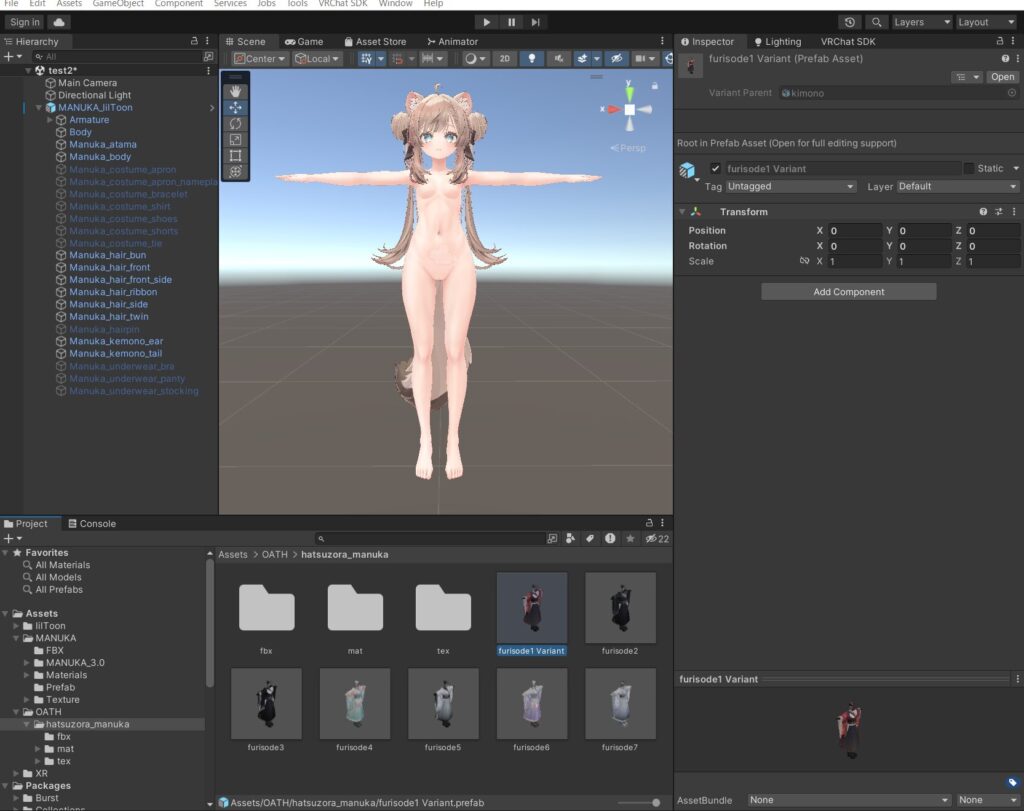
First, let’s confirm that the outfit we’ll be using has been imported into the Assets folder.
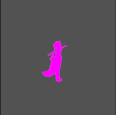
Once you’ve found the outfit folder, open it and look for the Prefab Asset 3 file.
At this point, if the Prefab Asset appears fluorescent pink4 as shown in the image below, there may be missing necessary files. Please check the outfit’s accompanying instructions or the sales page.
 Taro
Taro The outfit folder name is often set to the name of the outfit’s creator or the outfit name itself.
Keep this in mind when searching for files!
Placing the Outfit
Once you’ve found the outfit’s Prefab Asset, it’s time to dress your prepared avatar with the outfit!
The file to use here is the Prefab Asset file. Be careful not to confuse it with the similar-looking FBX file that may be placed in the same location, as shown in the image below.
After confirming in the inspector panel that the selected file is the outfit’s Prefab Asset file, directly drag and drop the Prefab Asset into the previously prepared avatar file within the Hierarchy in the Unity screen.
Due to Modular Avatar’s functional specifications, position adjustment data is loaded based on where it’s initially placed in the Hierarchy. Therefore, always introduce outfit data directly into the avatar data file in the Hierarchy by drag and drop. If you mistakenly place it elsewhere, you can delete the outfit data from the Hierarchy and then place it in the correct position using the same procedure to properly reflect the position information.
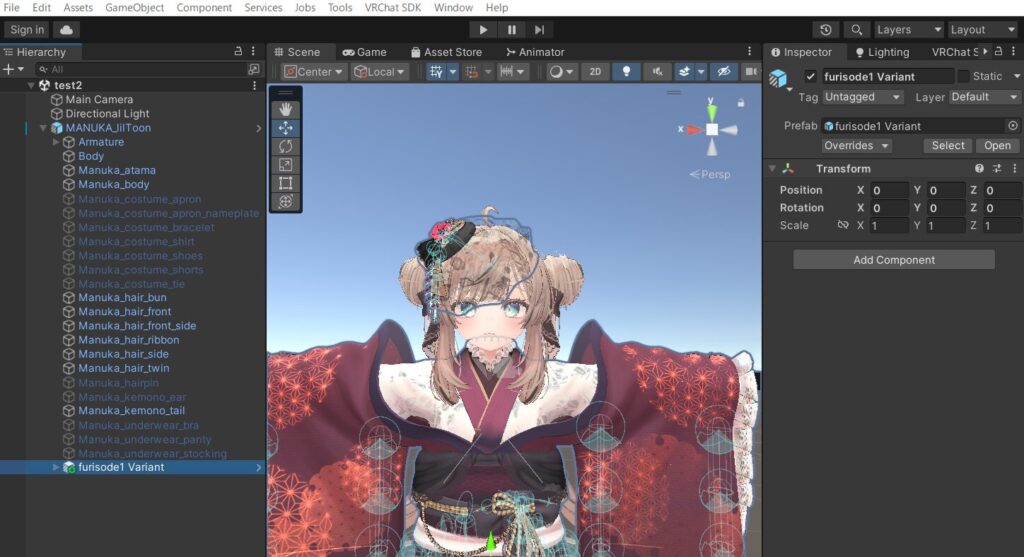
If the outfit’s PrefabAsset file is placed under the avatar file in the Hierarchy, and the avatar in the Scene is wearing the outfit as shown in the image below, you’ve succeeded.

With this, the outfit attachment is also complete.
Fine-tuning Outfits and Accessories
Compatible outfits are pre-adjusted by the creator for size and accessory placement when placed in the Hierarchy, so in most cases, there’s little need for adjustment. However, when adding accessories to prevent interference or adjusting the position of outfit accessories like hats, you may need to manually adjust the position of placed objects.
First, let’s expand the Armature5 within the outfit file. Expand the files within the Armature and find and select the file (bone) managing the position of the outfit part you want to move.
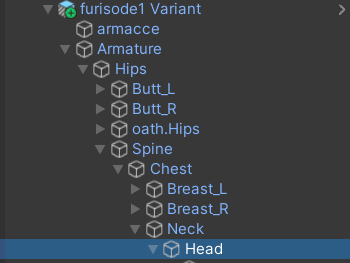
When adjusting the position of outfits or accessories, you need to select the corresponding bone within the Armature, not the outfit itself.
If only arrows are displayed without the object being highlighted as shown in the image below, you’ve succeeded.
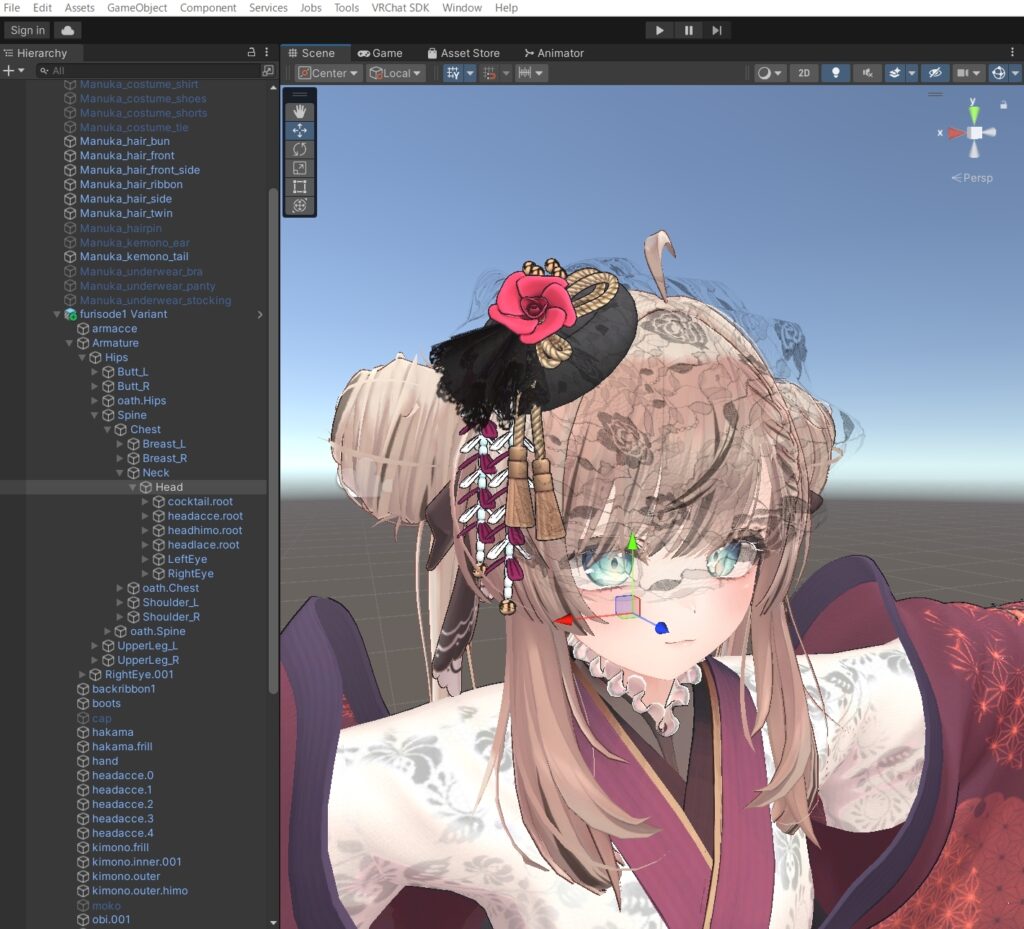
Now that we’ve specified the bone corresponding to the object we want to adjust, let’s actually move its position.
When you select a bone, three-colored arrows (blue, red, green) appear near the center point of the corresponding object, as shown in the image below.
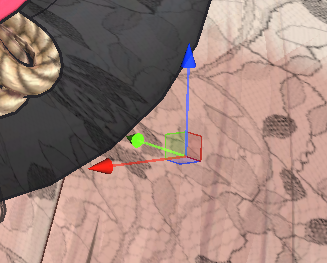
You can move the position of the selected object by clicking and dragging these arrows with your mouse. If you can move the object’s position as shown in the image below, you’ve succeeded.
If you accidentally move a part you didn’t want to move, you can undo the last operation by pressing Control + Z simultaneously while the Unity screen is displayed.
Operating Modular Avatar
After placing and adjusting the outfit, let’s use Modular Avatar to dress the avatar with the outfit.
Types of Dressing Methods with Modular Avatar and How to Distinguish Them
The methods of dressing using Modular Avatar can be broadly classified into three types based on the outfit’s compatibility.
- Outfits with specialized settings added for use with Modular Avatar
- Outfits designed for dressing the avatar but without MA-specific settings
- Outfits not designed for MA or dressing the used avatar
(Including incompatible outfits and those designed only for dressing with other tools)
This article will explain the dressing methods for types 1 and 2.
How to Determine Compatibility
Here’s an example of how to determine the compatibility of the outfit you’re dressing:
If the outfit specifies individual operation methods for dressing, please follow those instructions.
Select the compatible outfit file and display the components in the inspector as shown in the image below.
If Modular Avatar components exist in the inspector as shown in the image below, specialized settings have been made. Conversely, items without MA components are outfits without specialized settings.
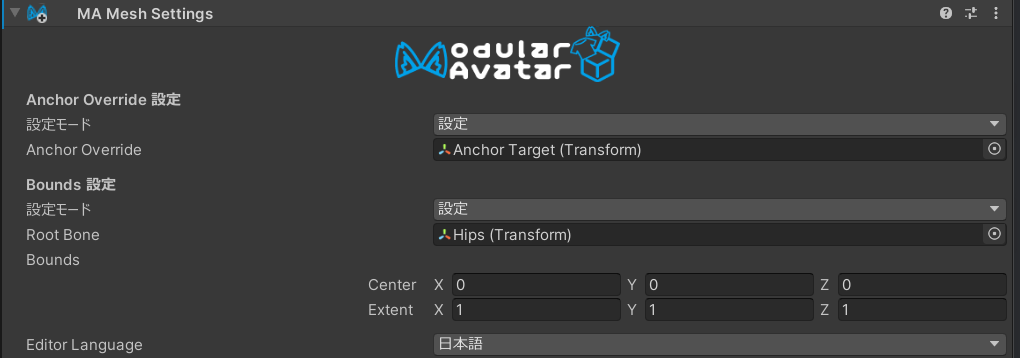
For Outfits with Specialized Settings for Modular Avatar
Outfits with specialized settings added for use with Modular Avatar will automatically complete the dressing process just by placing them under the avatar file in the hierarchy, as shown in the image below.

Once you’ve confirmed that the outfit placement is complete, proceed to uploading the avatar and verifying its functionality.
For Compatible Outfits Without Modular Avatar Settings
Compatible outfits without specialized settings for Modular Avatar require you to add the specialized settings yourself and dress the outfit.
Right-click on the outfit placed within the avatar as shown in the image below.
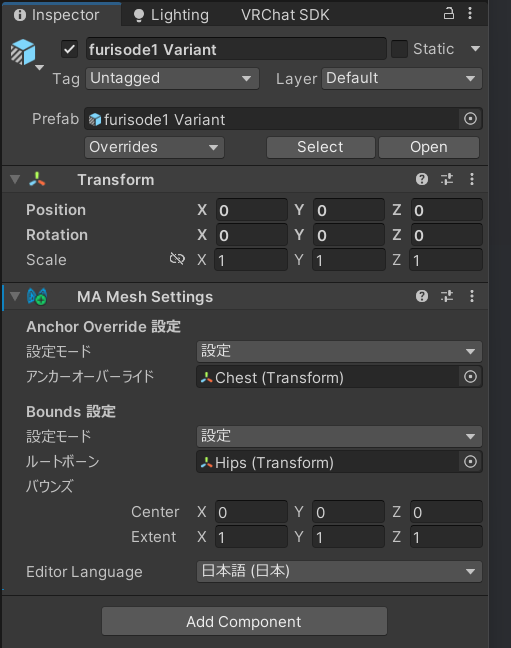
From the displayed menu, select Modular Avatar → Setup Outfit.
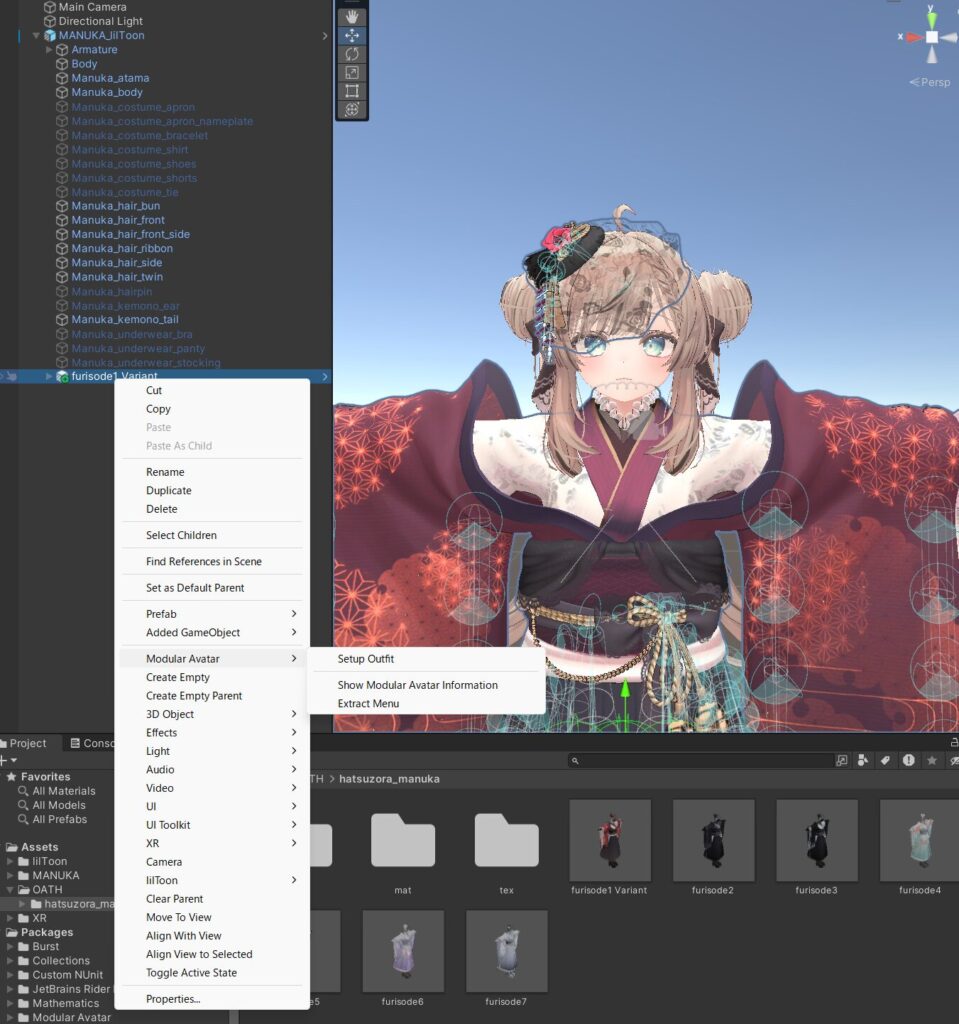
If Modular Avatar components have been added to the inspector as shown in the image below, you’ve succeeded.
Once you’ve confirmed the addition of the components, proceed to uploading the avatar and verifying its functionality.
▪Upload and Fine-tuning
Functionality Check and Adjustments
Once you’ve completed the customization, let’s upload the avatar to VRC and check its functionality!
Customized outfits may sometimes have issues when moving, depending on the clothing’s characteristics. While it’s possible to fix all these issues, it requires high technical skills and time. For beginners or those unfamiliar with customization, it’s recommended to compromise to some extent initially and try to make further adjustments once you’ve gained more experience.
Checking Basic Movements and Standing Posture
First, let’s check the basic movements. After wearing the customized avatar, it’s effective to perform basic actions like walking, running, crouching, sitting, moving your arms, or making slight movements. At this point, it’s okay if the clothes follow the body’s movements without excessive clipping through the torso.
While it’s possible to check basic movements on desktop, those with VR environments can improve the quality of customization by simultaneously checking their usual movements.
Taro Even if it looks perfectly placed in Unity, it might look odd when actually checked in VRC…
It’s recommended to do a functionality check once before closing Unity when doing customization work.
Functionality Check in Desktop Environment
While VR environments are often better for finding oddities during customization, they can’t match the convenience of desktop. Moreover, it’s difficult to perform actions like moving hands in desktop environments as in VR, and it’s not uncommon to notice oddities only in VR state. However, you can achieve something close to VR state functionality checks using the following methods:
1. Use a customization support world
Among the many worlds, there are some equipped with features to support customization. You can identify potential issues during customization regardless of the environment by using features like avatar 3D mirrors and simple dance systems.
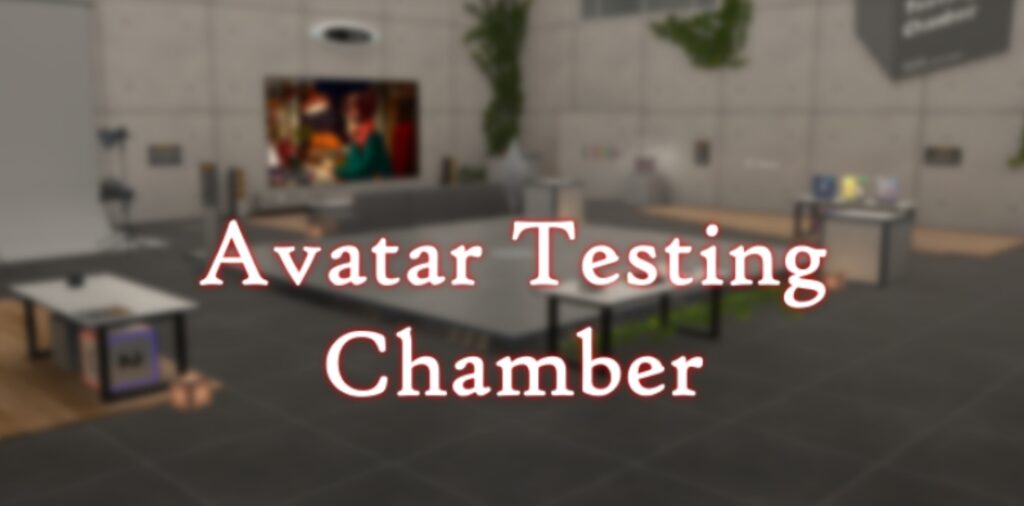
Avatar Testing Chamber by Ziggor - a virtual reality world on VRChat
「Avatar Testing Chamber」
author’s recommended customization support world. It’s packed with useful features for customization yet lightweight! Recommended for both beginners and advanced users.
2. Use dance worlds
Dance worlds where you can dance to music include some that allow you to freely make your avatar dance by playing pre-recorded motion data. While not originally created for customization purposes, they are useful for discovering outfit breakages by taking various postures while dancing.
Avatar Testing Chamber by Ziggor - a virtual reality world on VRChat
Please note that dance worlds that play motion data may have rights issues. Be cautious when using them for customization checks.
Fine-tuning the Outfit
If you notice any oddities or breakdowns during the functionality check, you can fix them by adjusting the blend shape keys installed on the avatar or the size of the outfit.
When adjusting the size of an outfit, it is recommended to follow these steps each time, even though it may be tedious:
1. Create a backup of your current work.
2. Make small adjustments to the outfit.
3. Upload the avatar to VRChat.
4. Check the results in-game.
Taro Fine-tuning the outfit is a test of patience and stamina!
You might find half a day has passed once you start getting particular about it..
It might be okay to finish with just adjusting the blend shape keys without getting too caught up in it.
If there are no issues in the functionality check after adjusting the outfit, the customization work is complete. Great job, you’ve done well.
Explanation of How to Attach (Install) Accessories Using Modular Avatar
 Iso
Iso Please check this out too!! Let’s make your avatar even cuter by adding accessories!!
- The price mentioned in the article is as of June 14, 2024. ↩︎
- This is the price for the Manuka-compatible version. ↩︎
- Prefab Asset is like a recipe book for assembling models in a scene using materials found in the Assets folder. It contains the 3D model’s blueprint and instructions for putting it together. ↩︎
- This is commonly known as a material error. It indicates that the material data, which is responsible for the visual appearance of 3D objects, is either missing or not functioning correctly. ↩︎
- Armature is a structure designed to mimic human skeletal structure in 3D model data for reproducing human movements. ↩︎