When playing VRChat, haven’t you ever ever felt like “I’m sitting in real life but want my avatar to stand!”, or “My height doesn’t match everyone else’s during VR sleep…”?
The tool that can solve such problems is “OVR Advanced Settings”!
※Please note that this article is a translation from Japanese! Some text in the images may not be in English, so we appreciate your understanding!
もくじ
How to Install OVR Advanced Settings
This tool is only available in “VR mode”, so please keep that in mind!
【August 28th Update】
OVR has switched from being free to paid on Steam, but you can still download it for free from “GitHub.” So, please choose either “Steam” or “GitHub” to download it yourself!
OVR is updated regularly. While you can download it for free, I recommend purchasing it from “Steam” as a way to show your appreciation to the developer!
※Please complete either ①-A or ①-B.
①-A Download OVR Advanced Settings via GitHub
OVR Advanced Settings Download Page
https://github.com/OpenVR-Advanced-Settings/OpenVR-AdvancedSettings/releases/
Access GitHub through the link above and download “AdvancedSettings-installer.exe”.
Once downloaded, open the .exe file.
①-B Download OVR Advanced Settings via Steam
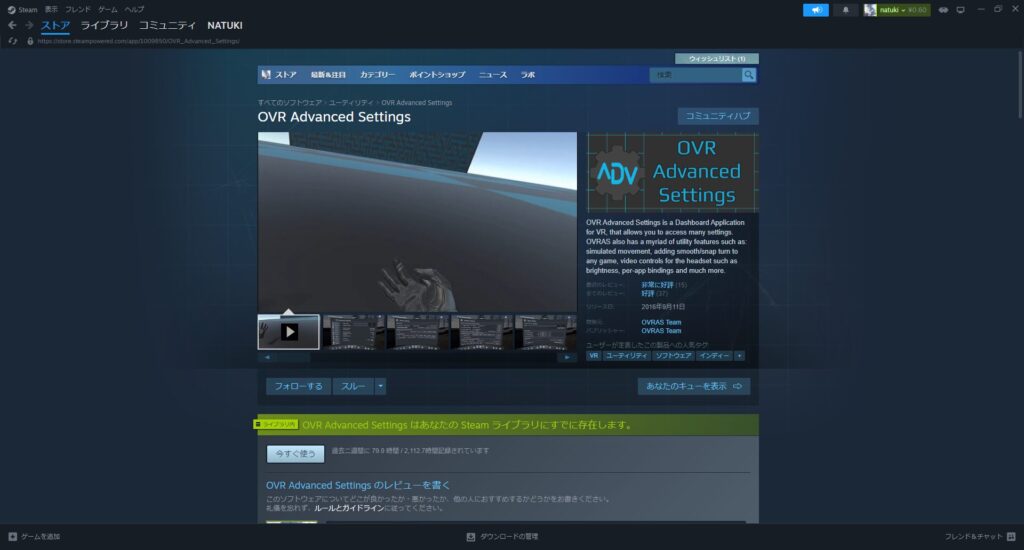
OVR Advanced Settings Download Page
https://store.steampowered.com/app/1009850/OVR_Advanced_Settings/
Purchase, download, and install it from Steam.
② Set Up OVR Advanced Settings
After downloading and installing, launch the application.
Start SteamVR, and when you select “Library”, you should see “OVR Advanced Settings”.
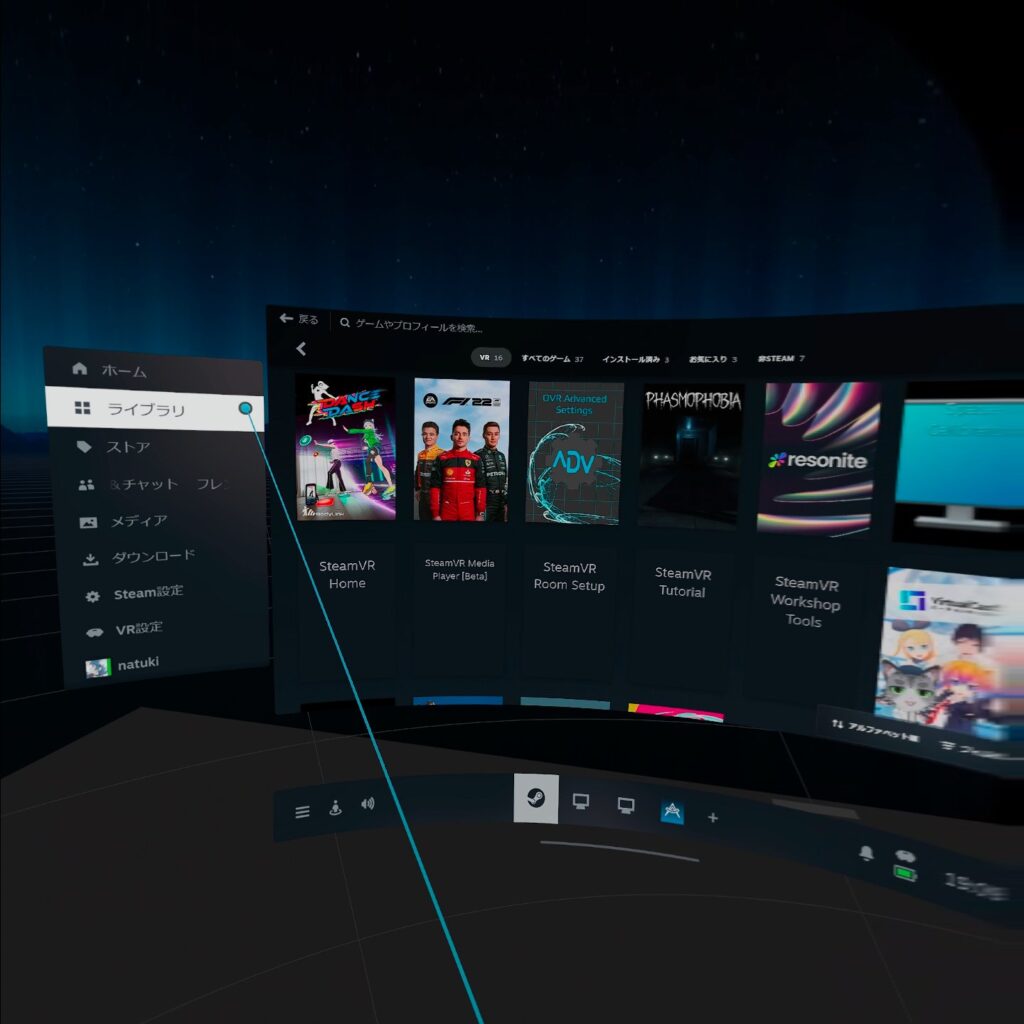
Select “OVR Advanced Settings” and press “Launch”.
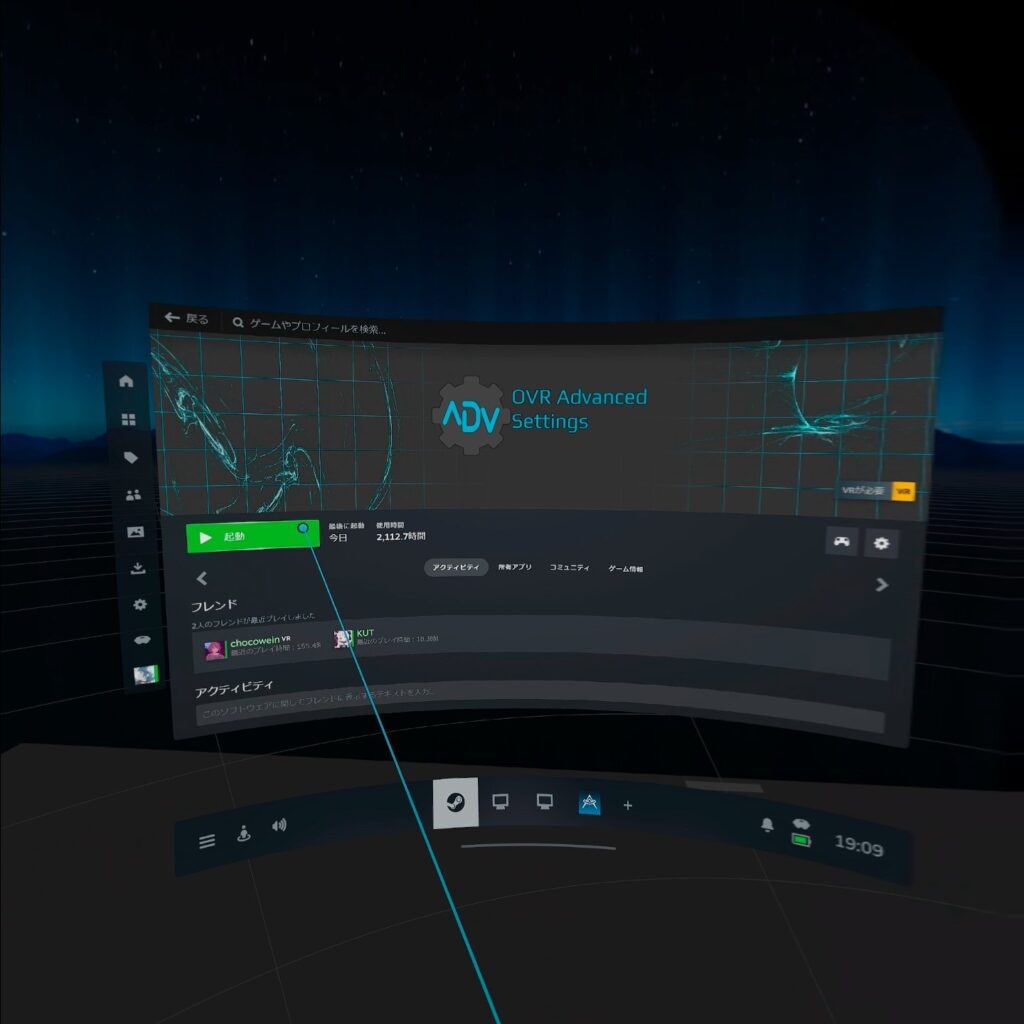
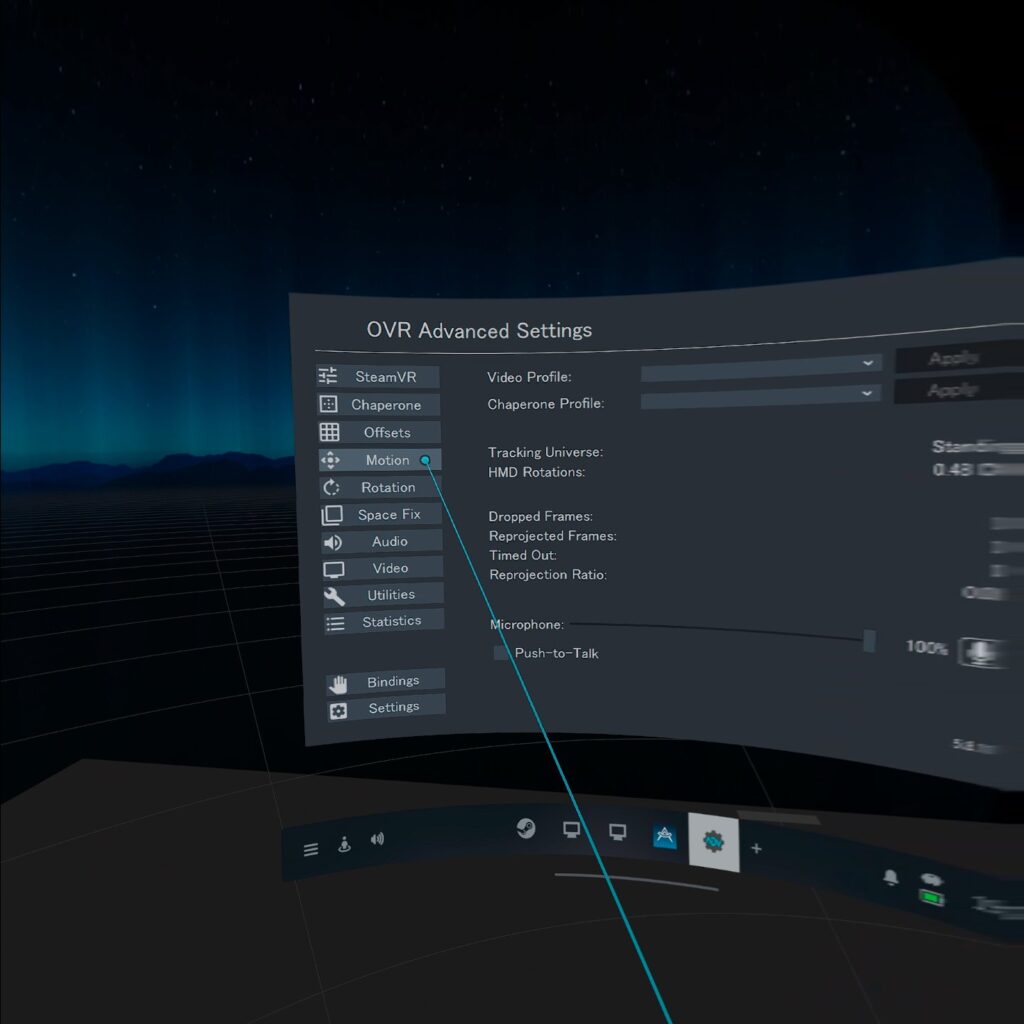
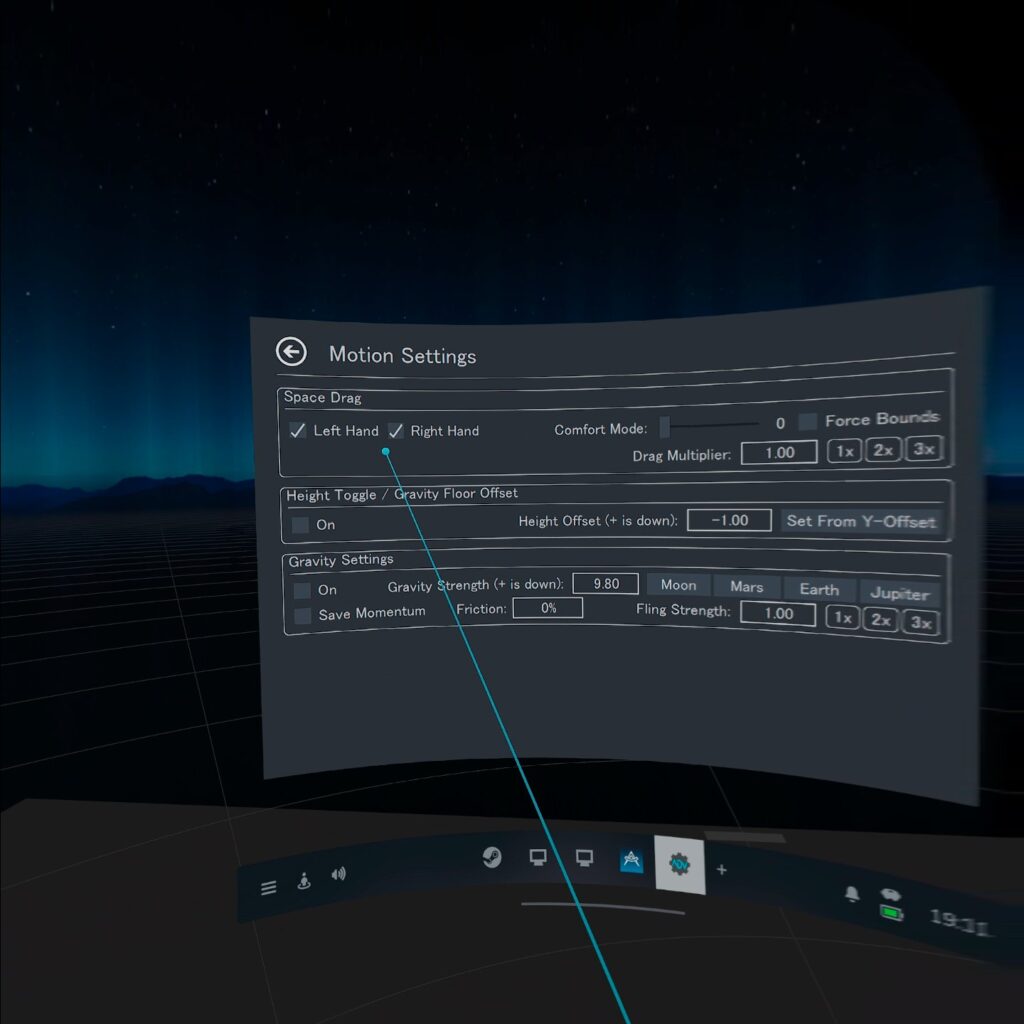
Once launched, select “Motion”.
Make sure to check both “Left Hand” and “Right Hand”.
③ Set Key Bindings
Select “Bindings”.
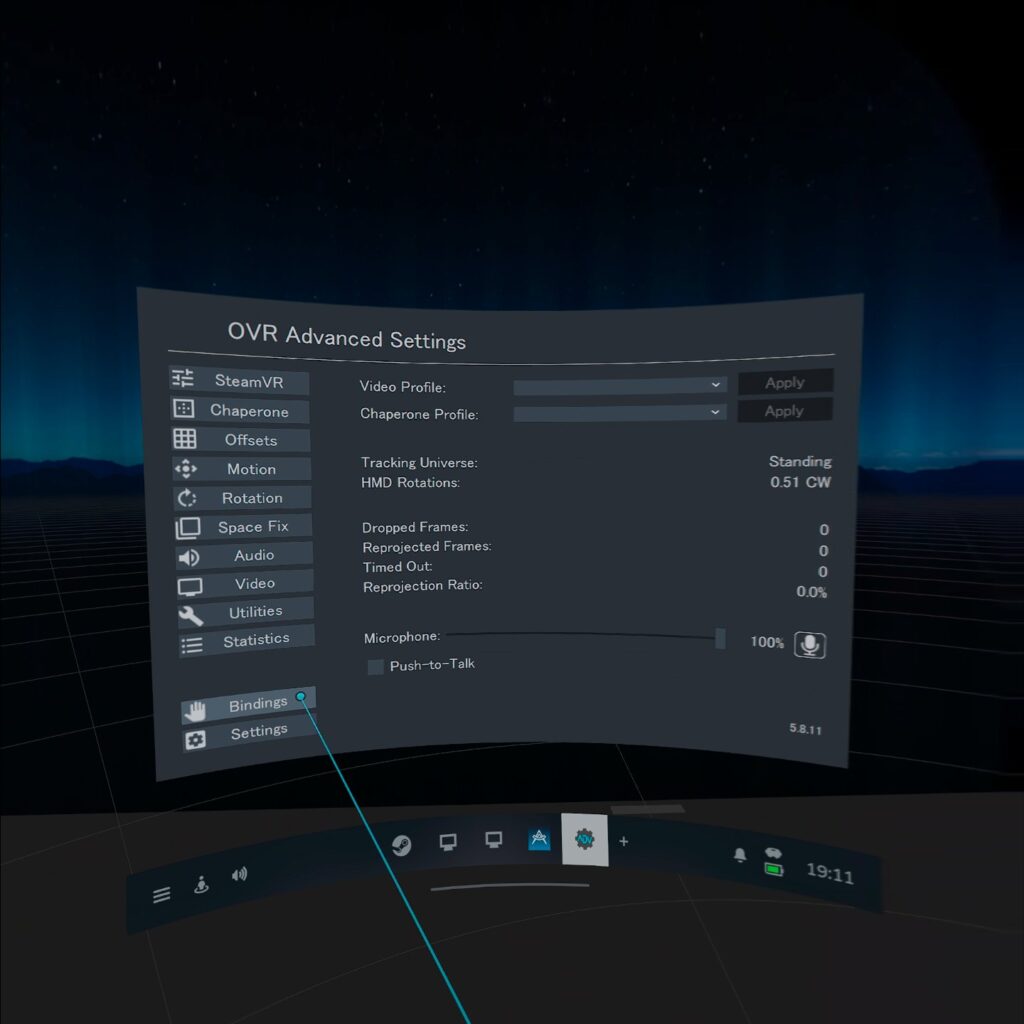
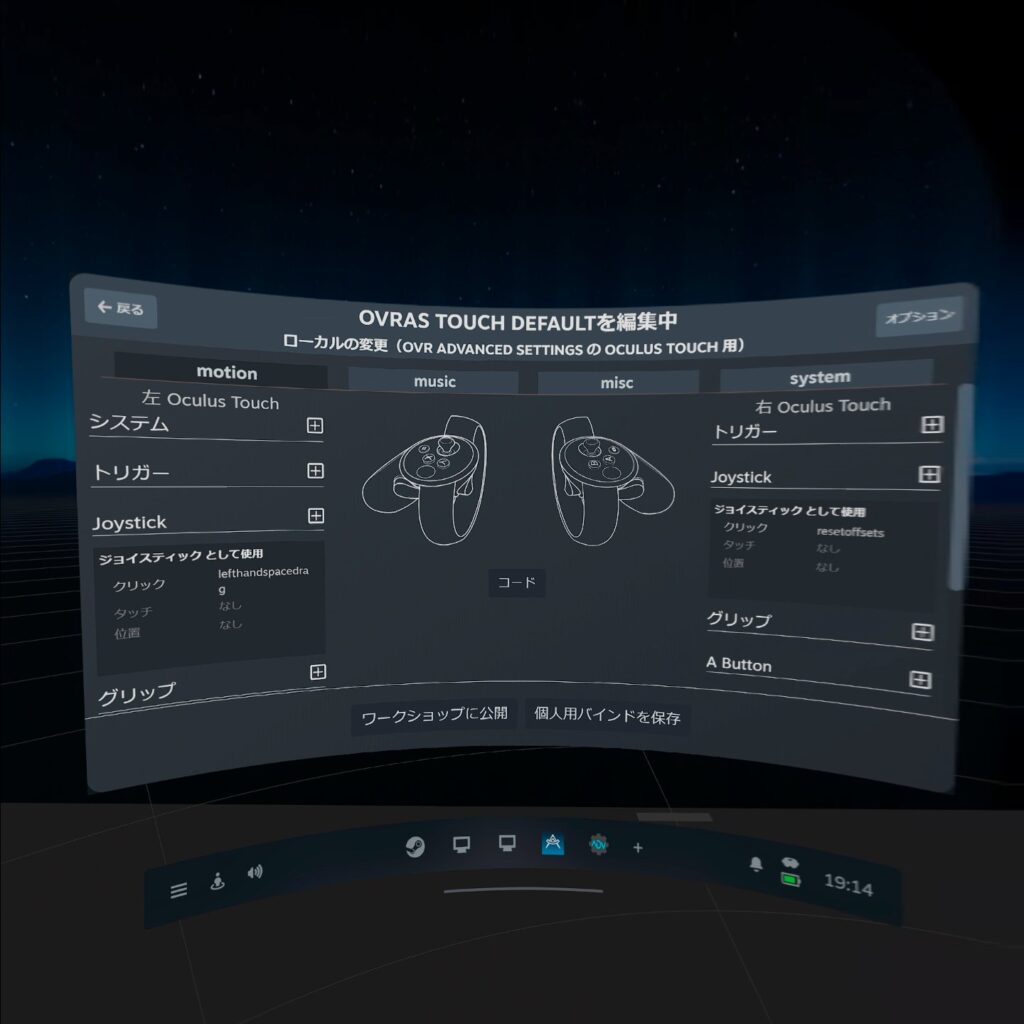
Assign buttons for adjusting and resetting height. The recommended button is pressing down on the joystick.
※In this example, we’ll assign height adjustment to pressing down on the left joystick and resetting height to pressing down on the right joystick.
First, assign a button for height adjustment:
On the left side, select “+” next to “Joystick”.
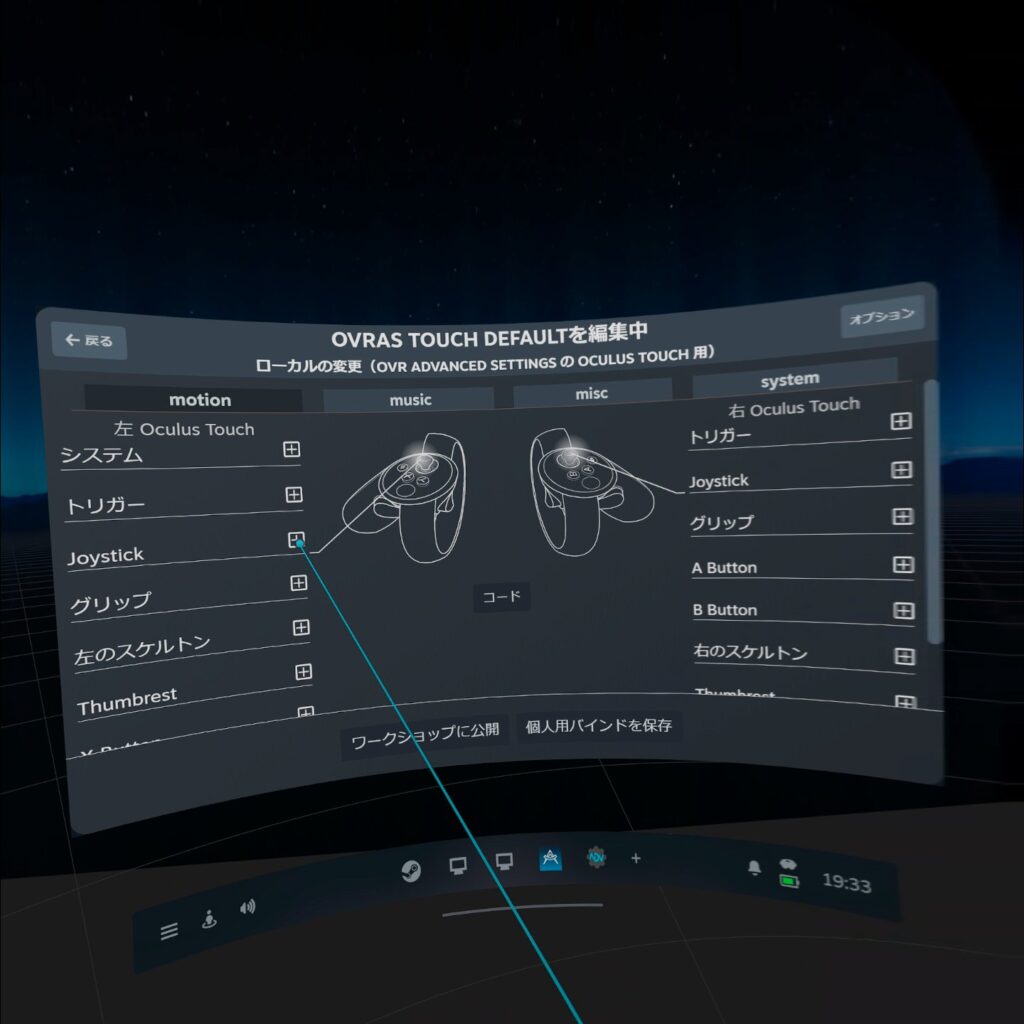
Select “Joystick”.
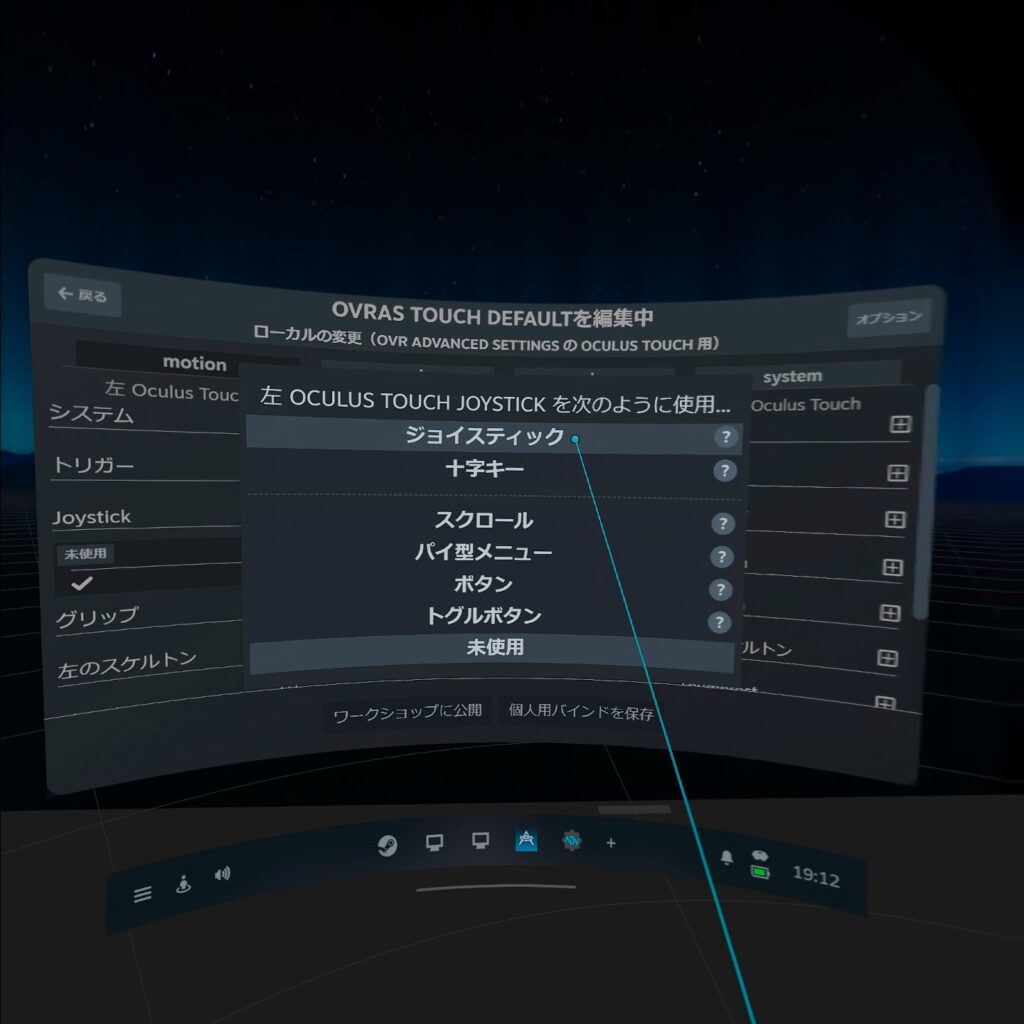
then choose “None”
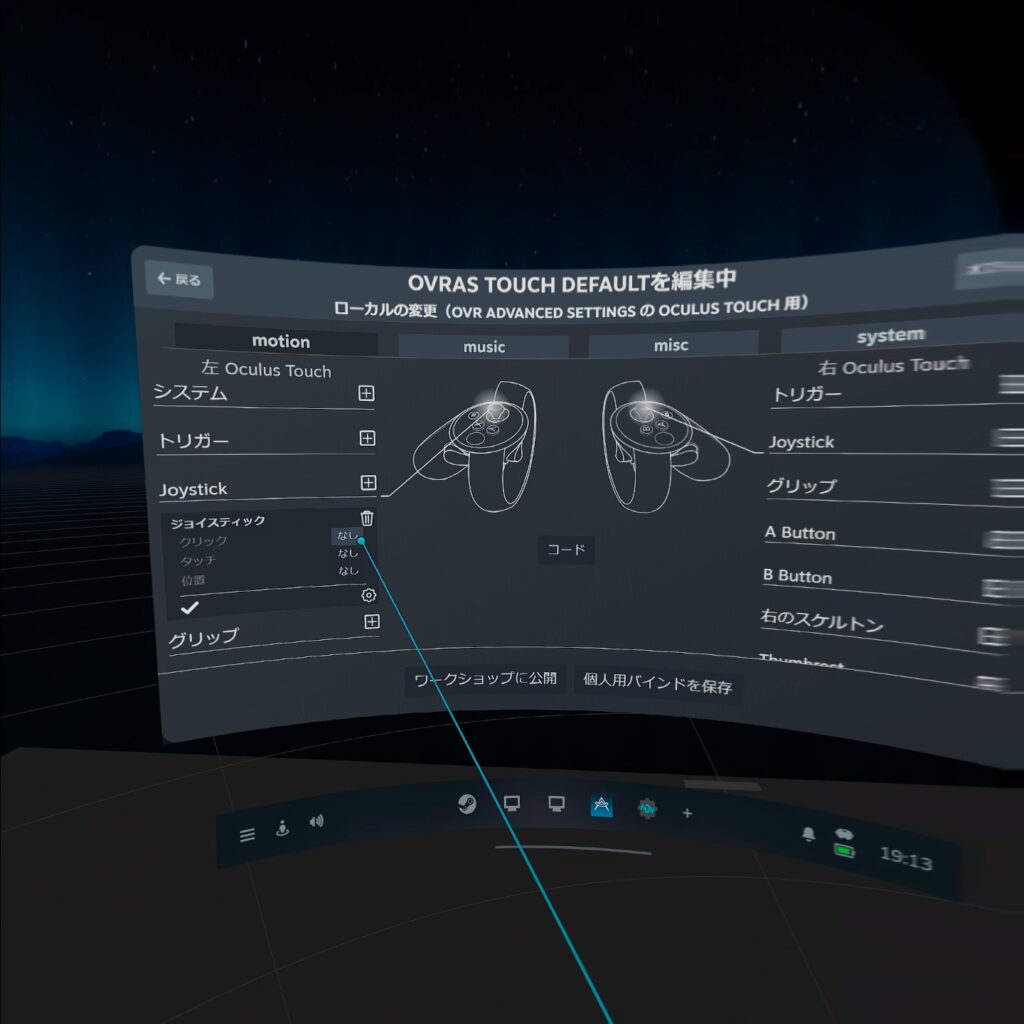
and finally select “left hand space drag”.
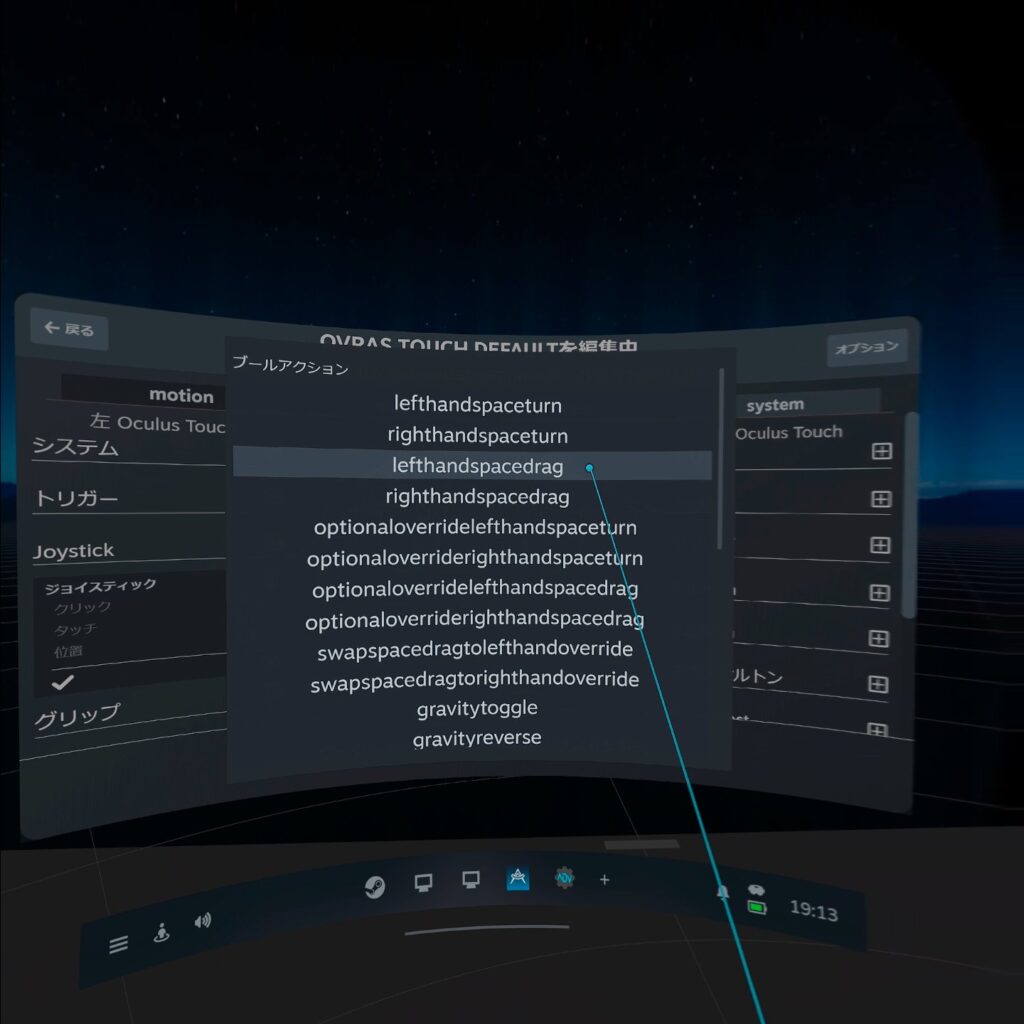
Next, assign a button for resetting height.
On the right side, select “+” next to “Joystick”.
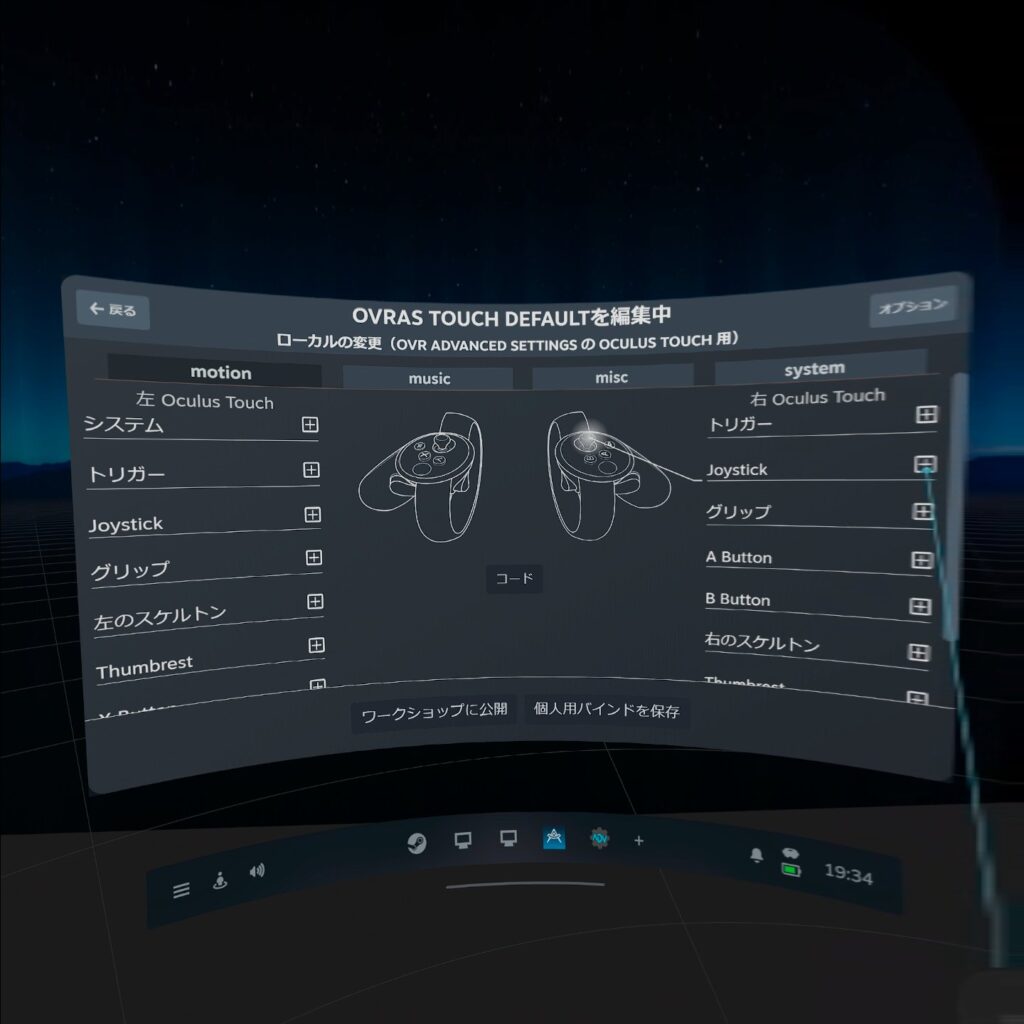
Select “Joystick”,
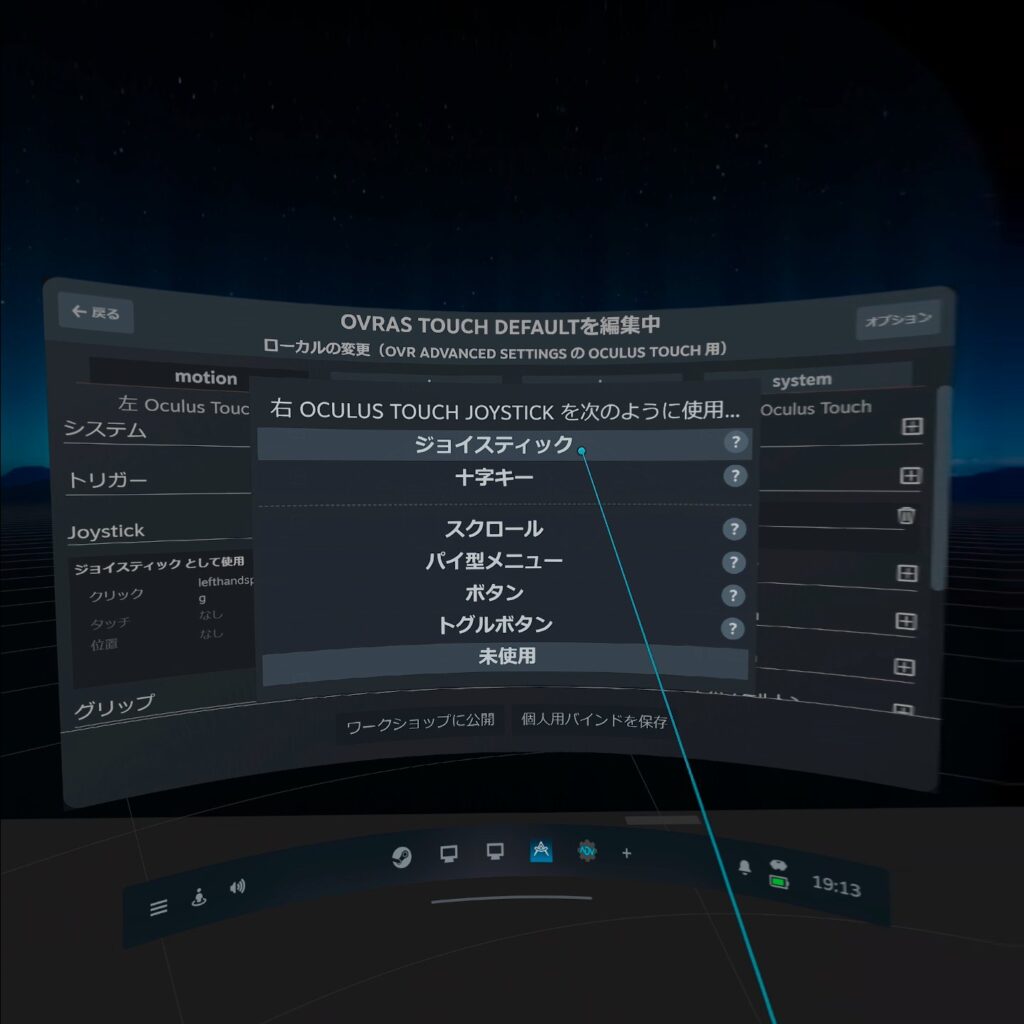
then choose “None”,
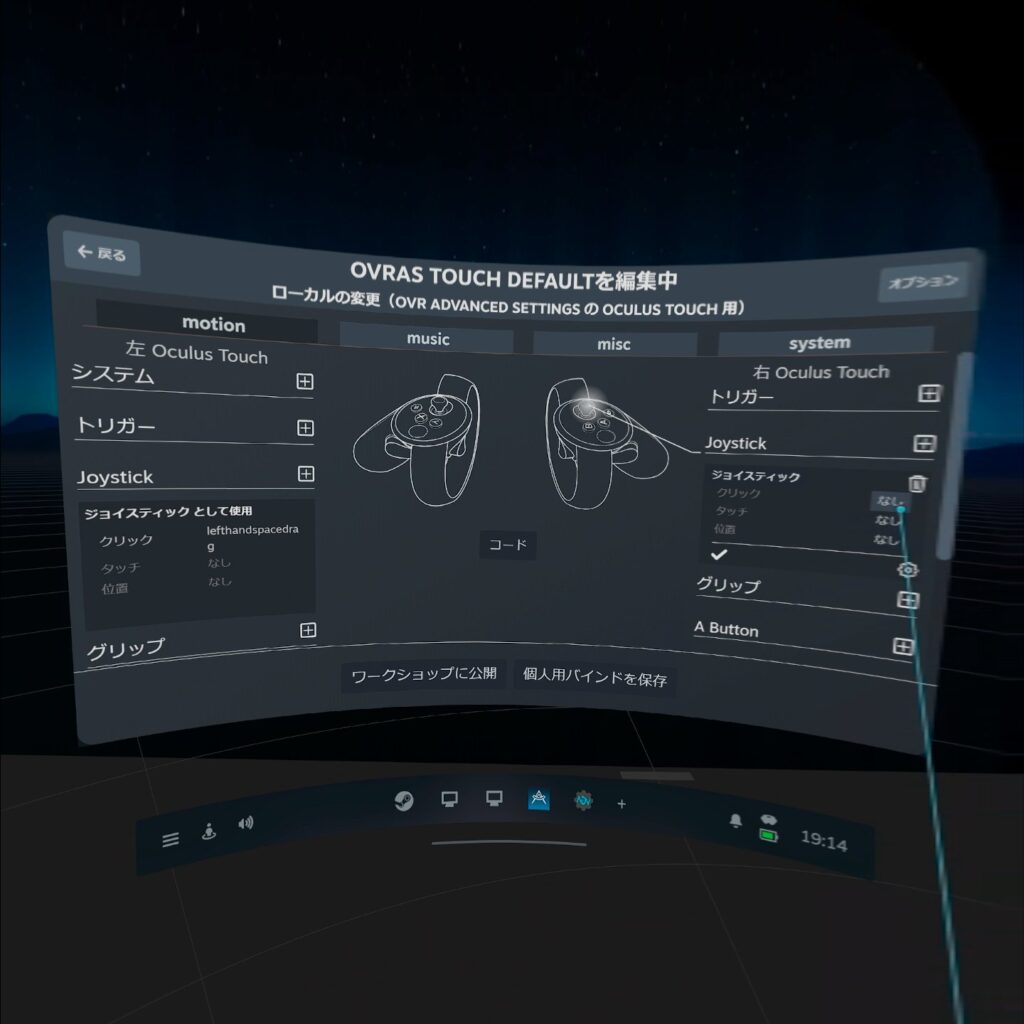
and finally select “reset offsets”.
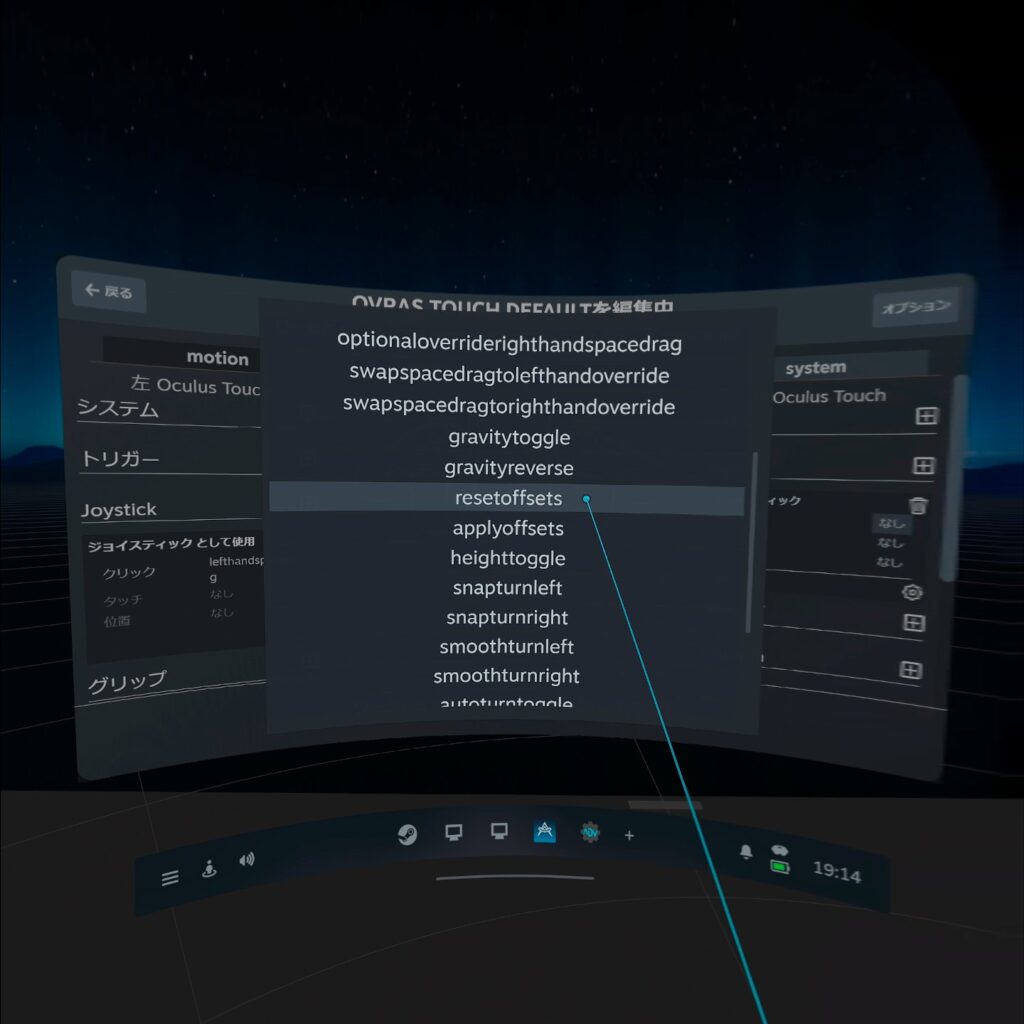
Once you’ve finished these settings, press the check mark under the assigned joystick to save.
If everything looks like the image below, you’re all set!
How to Use OVR Advanced Settings
If you’ve followed the setup correctly, pressing down on the left stick while moving your controller up or down will adjust your avatar’s height.
Conversely, pressing down on the right stick will reset any height adjustments you’ve made.
It might be tricky at first to get used to the controls, but it’s a super handy tool, so hang in there and get comfortable with it!
 Natsuki
 When used well, you can take great photos even without full-body tracking!
Auto-Launch Setup
If you don’t set up auto-launch, you’ll have to manually start OVR Advanced Settings every time. So make sure to configure this setting!
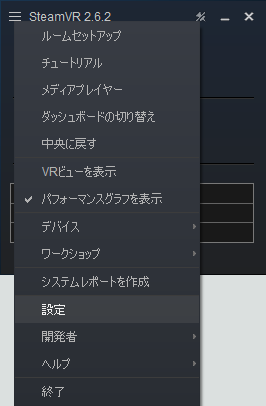
From the SteamVR menu, Open Settings.
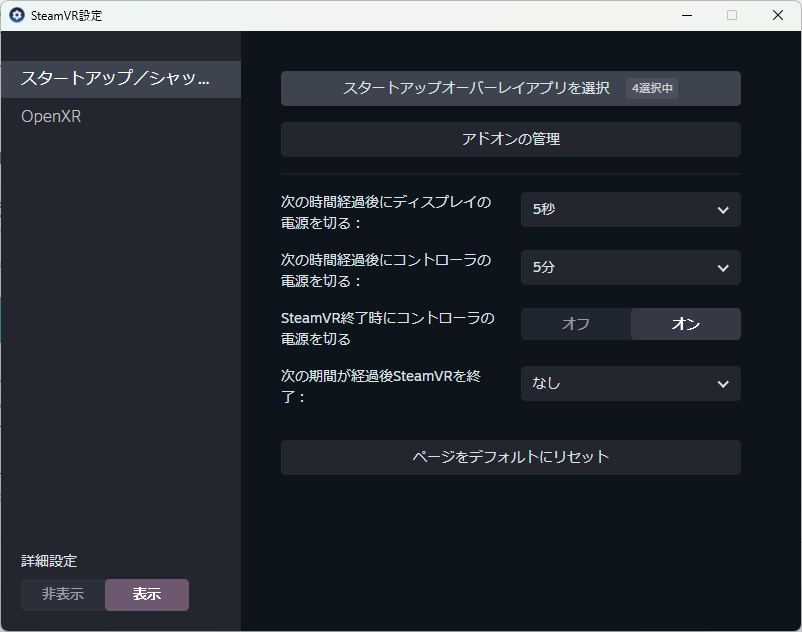
Click on Choose Startup Overlay Apps.
and turn on OVR Advanced Settings.
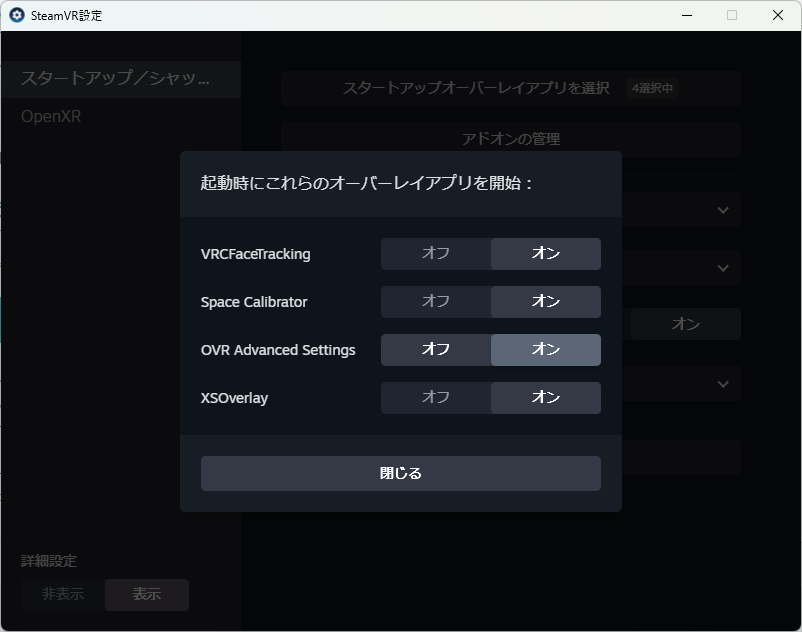
That’s it! You’ve completed the auto-launch setup! Great job!

